Description:
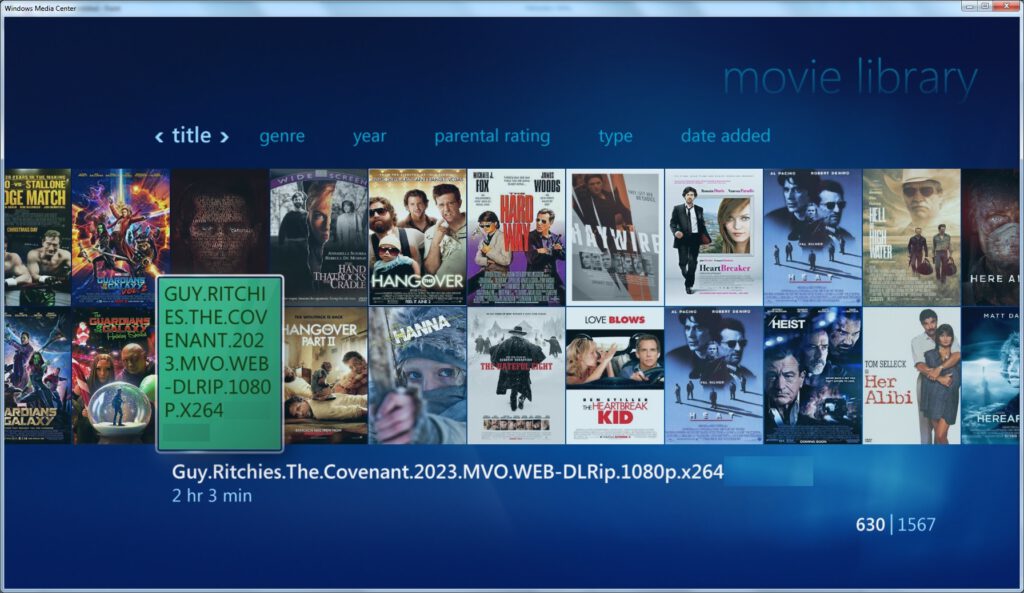
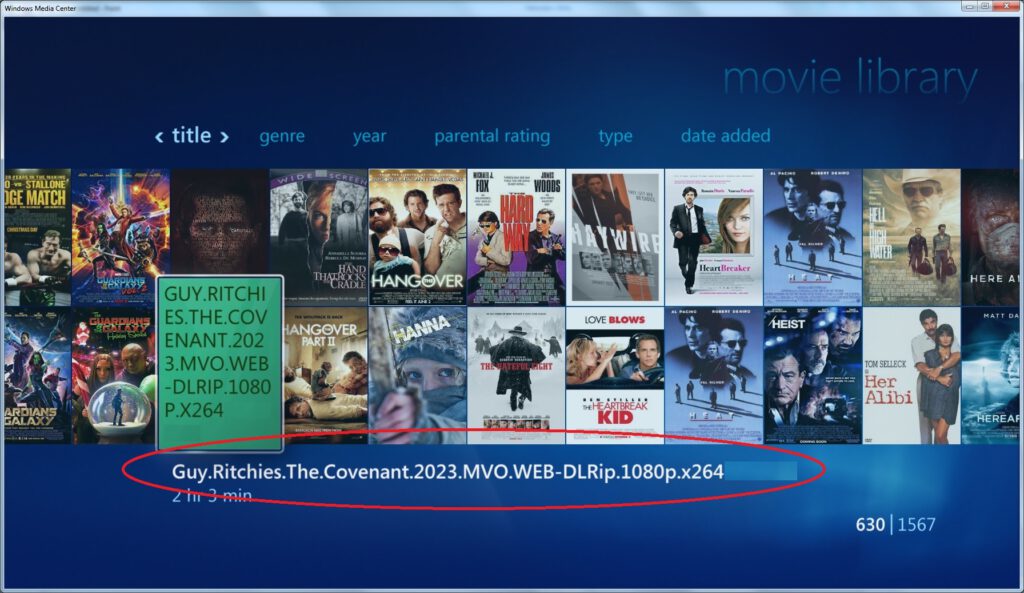
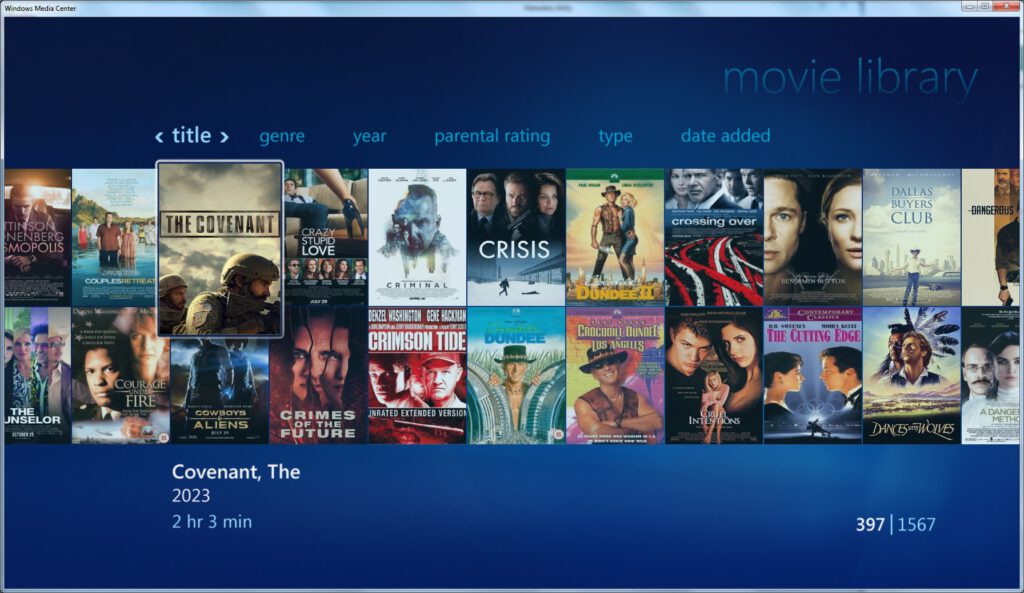
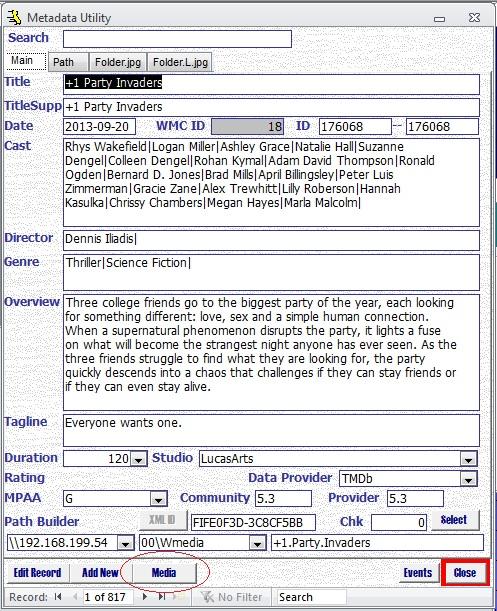
The Media Title is shown ‘Wrong’. This even though the path of the Media is correct and all the Medatadata has been properly generated with Medatadata Utility.

Cause:
2 Main possible Options:
1 – Media has been ripped to a single file.
2 – DVD Rip
Resolution:
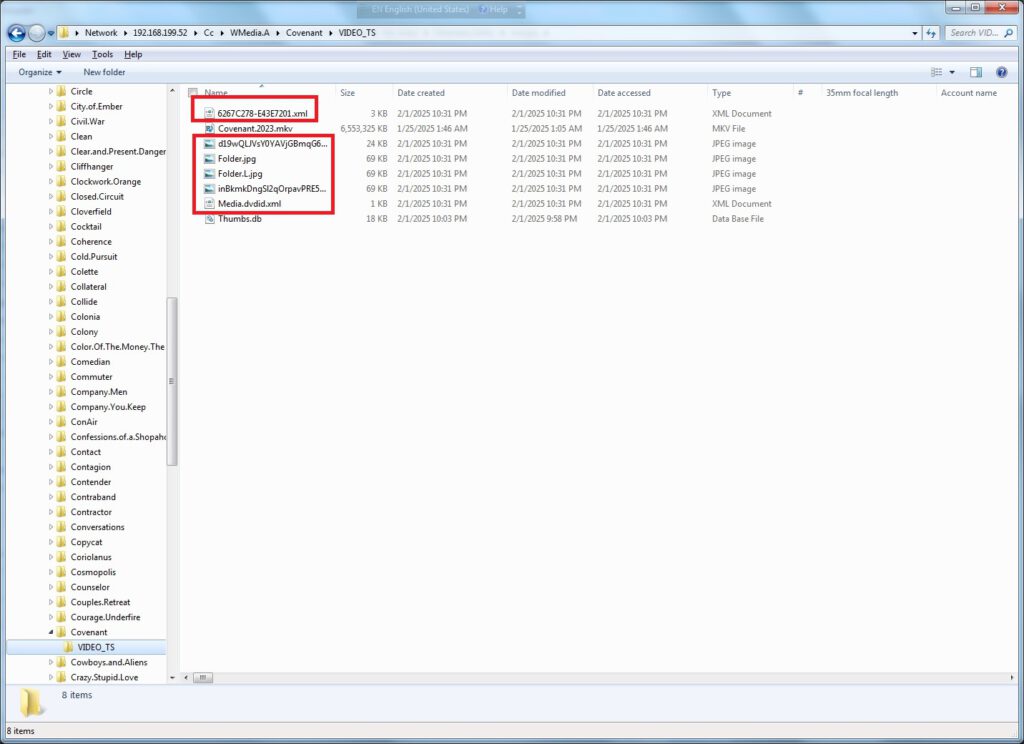
1 – Media has been ripped to a single file.
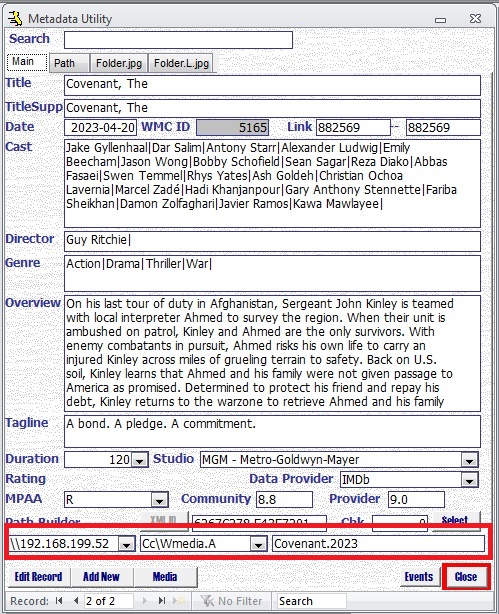
- Metadata Utility Verification
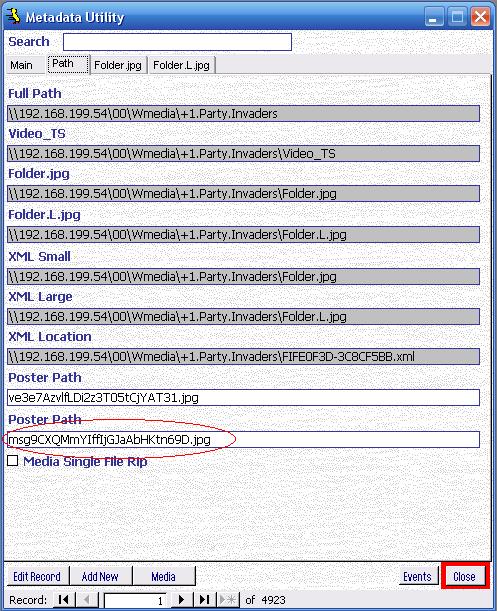
- From Medatadata Utility open the Path location for the media
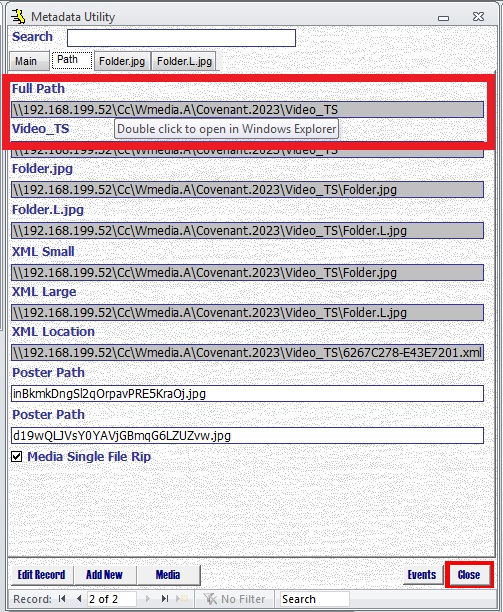
Note:
- Media has been ripped into a single File
- No Metadata Information, either XML Files and/or CoverArt Files are found
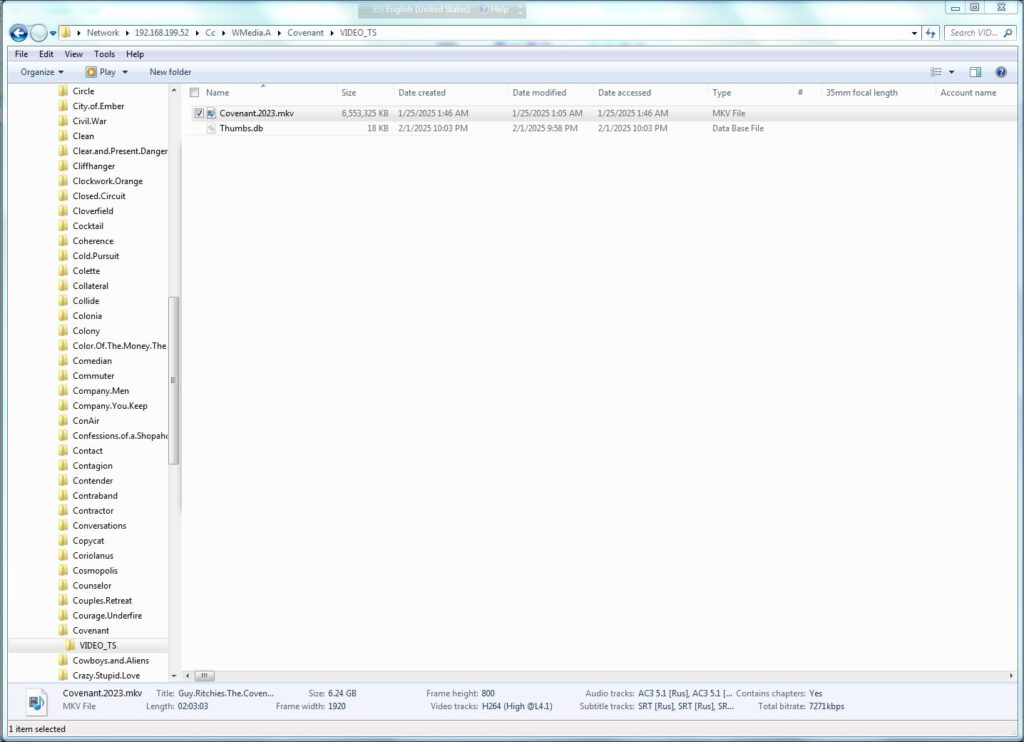
- Applicable/Possible if the Media has been ripped into a single File
- Place the Record in Edit Mode (double click on the Title or click on the Edit Button)
- Select Media Single File Rip

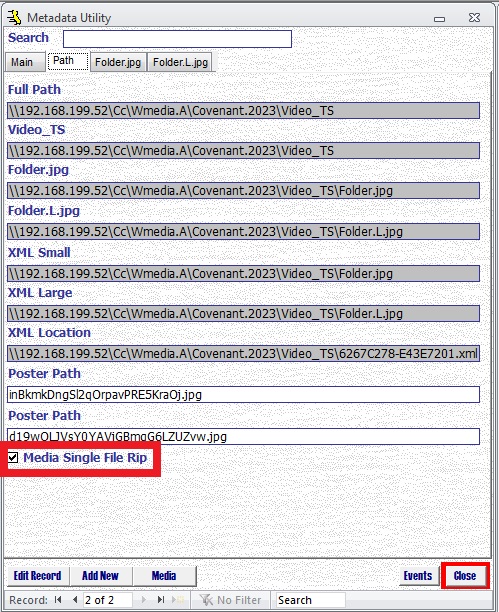
- Generate the Medatadata Information
as well as
- Download the Coverart Information
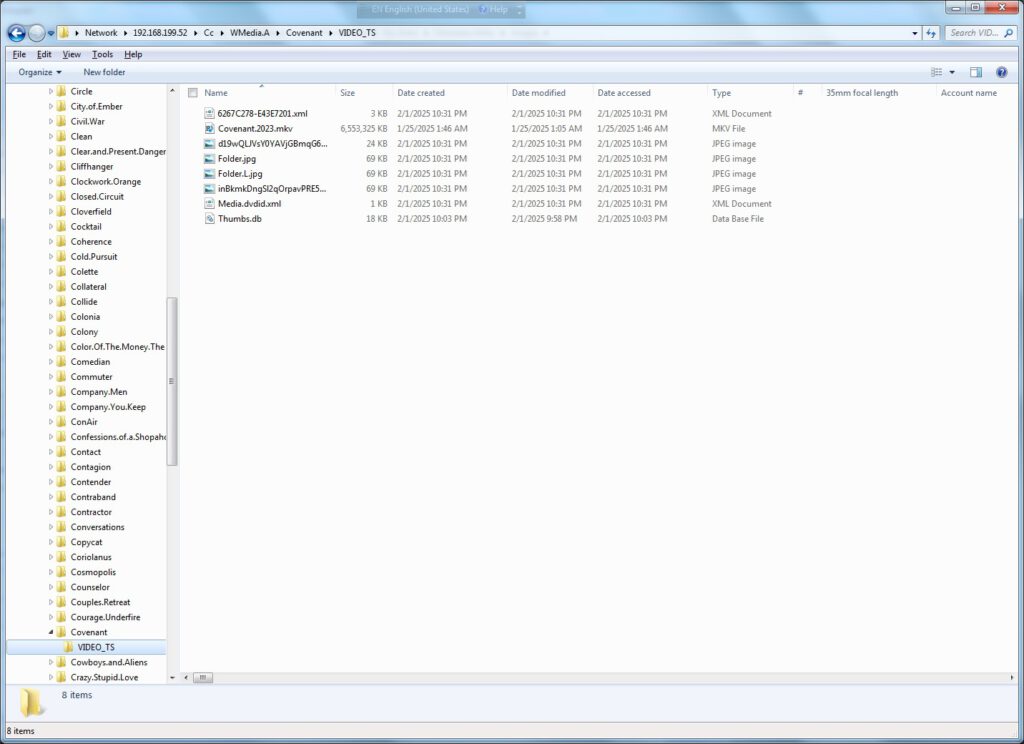
- Verification files have been generated
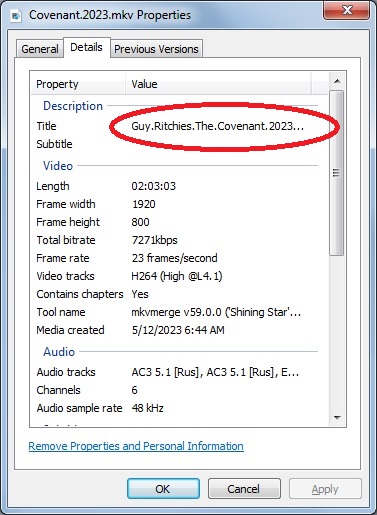
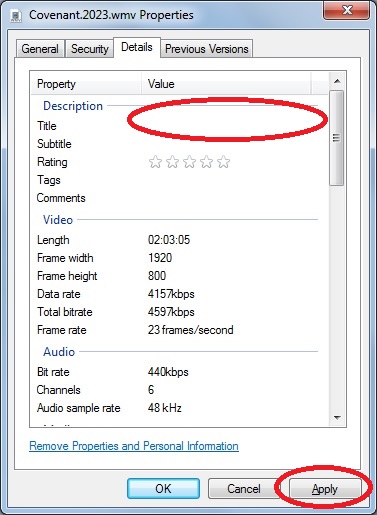
Media Title Changes:
Right click on the Media File and select Properties
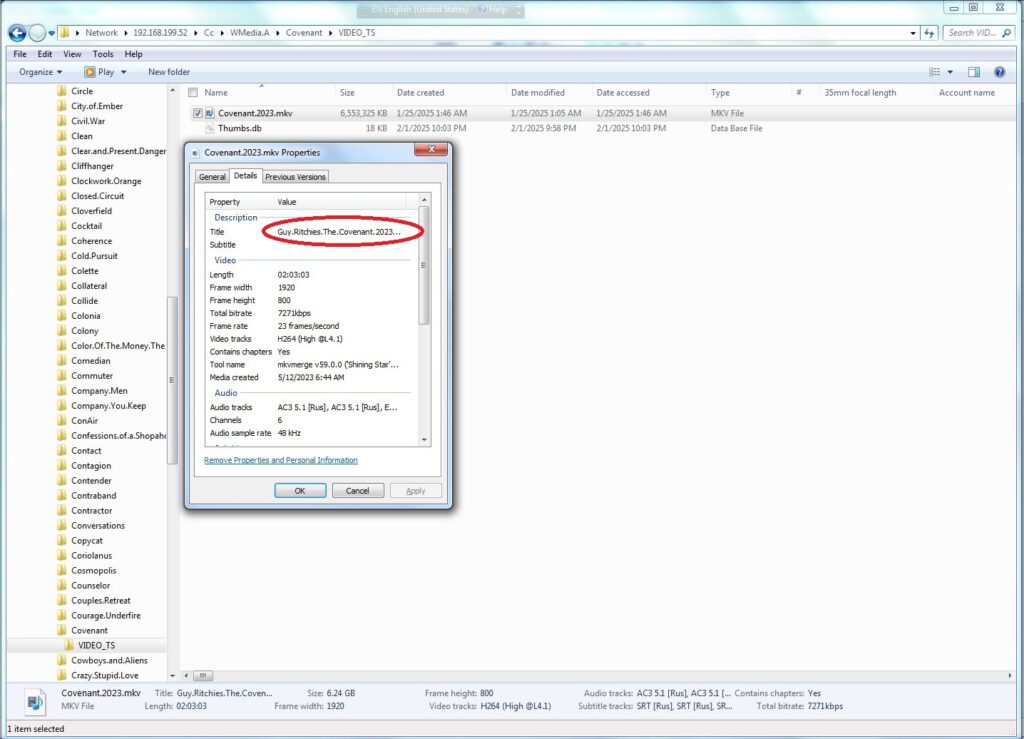
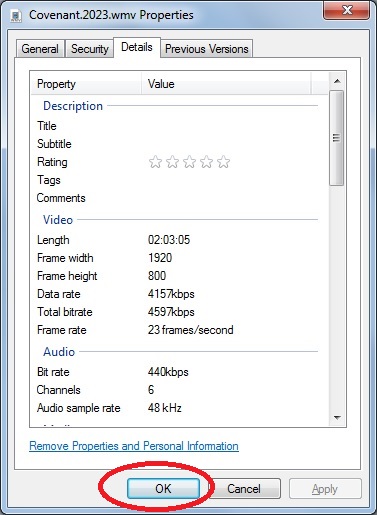
Delete the contents in the Property Value ‘Title’ – click Apply – Click Ok to close the properties Window.
2 – DVD Rip
- Generate XML Medatadata Information for the Media
- Download the corresponding Mediaart for the Media
Results:
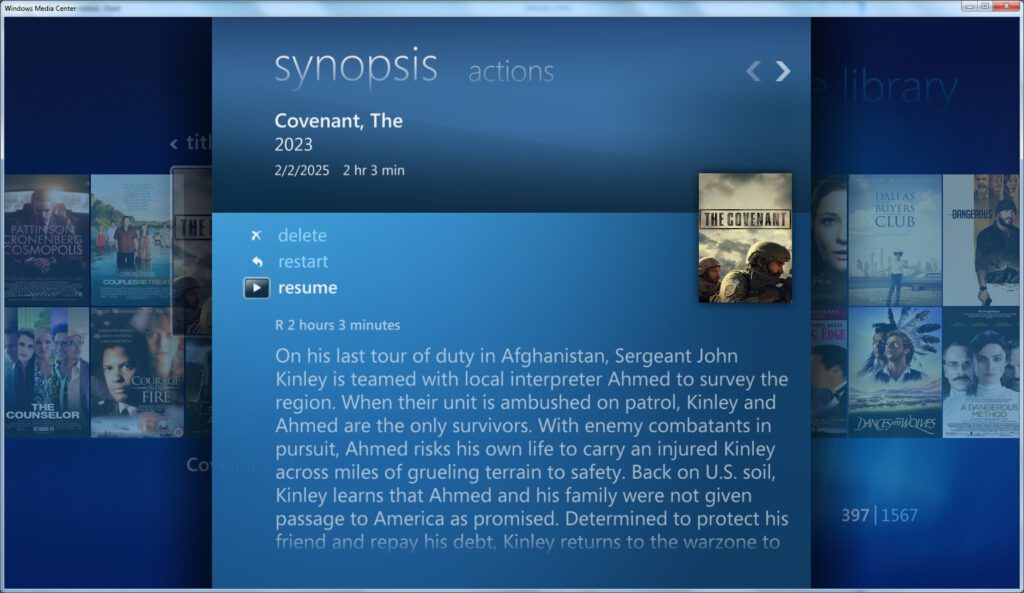
Metadata Information for the Media will be shown
Notes:
For additional information, see the sections:
‘Metadata Utility – Adding Movie Information’ (Here).
‘Metadata Utility – How To – Path’ (Here).
‘Metadata Utility – WMC XML File(s) Generate’ (Here).
‘Metadata Utility – Download Cover Art’ (Here).
‘Metadata Utility – Description – Path – Video_TS’ (26) (Here).
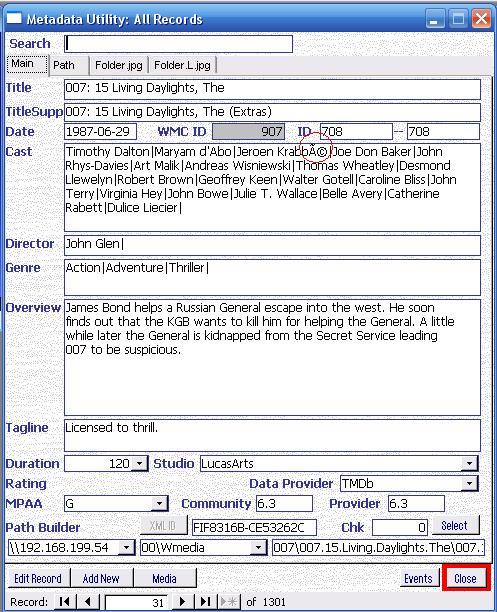
Description:
Movie is shown with the ‘wrong’ Title and/or CoverArt is NOT shown.
This phenomena is even though the correct Movie / Series Information has been properly entered in Metadata Utility
AND
The necessary XML Files
AND
Media/CoverArt has been downloaded for the Movie (see documentation in the links below)
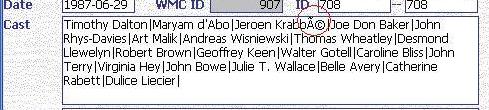
Cause:
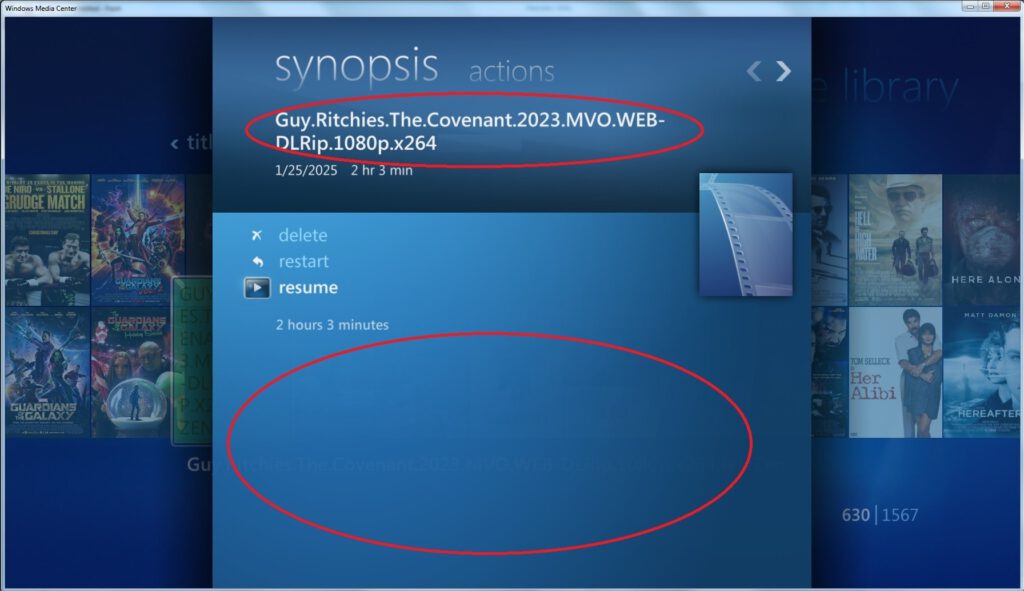
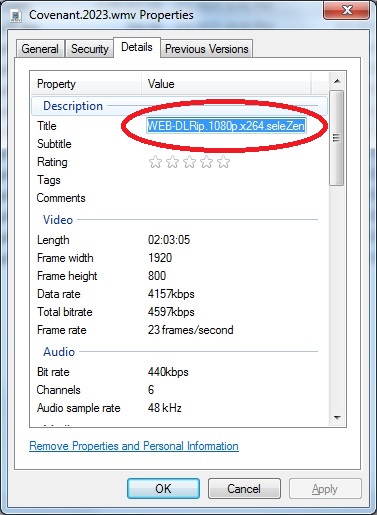
A Title is found in the Attributes of the Media File.
This phenomena is particularly known to happen with Single Ripped files.
Note:
The Title Attribute Field should be Null/Empty –as the Metadata Information is managed through Metadata Utility for Windows Media Center–
Solution:
Edit the Attributes of the File and Delete the (false/wrong) Title in the Attributes for the File.
For Additional Information, see the documentation in the link(s) below:
Metadata Utility – Operation – Adding Movie Information (Automated) (here)
Metadata Utility – Operation – Adding Movie Information (Manually) (here)
Metadata Utility – Operation – place Record(s) in the ‘Selected Records’ Queue (here)
Metadata Utility – Operation – Bulk Import Process Master Records (BIPMR) (here)
Metadata Utility – Operation – Bulk Import Process Child Records (BIPCR) (here)
Metadata Utility – Operation – Repair (Re-Link) ‘Orphan’ Records (here)
Metadata Utility – Operation – Merge Generator (Generate Windows Media Center Metadata – XML Files) (here)
Metadata Utility – Operation – Reports (here)
Metadata Utility – Operation – Merge Generator – ‘WMC XML Profile Cache’ (here)
Metadata Utility – Operation – Merge Generator – ‘WMC XML File(s) Generate’ (here)
Metadata Utility – Operation – Merge Generator – ‘Download Cover Art’ (here)
Metadata Utility – Operation – Merge Generator – ‘XML Cache’ or ‘XML Generation’ (here)
What is the difference in Metadata Utility between: -‘Media Library’ -‘Pending’ -‘Selected’ -‘Suspect’ -‘Orphan’, ‘Last Online Search’, ‘Archive’ Records Queue? (here)
What Data, if any, can Metadata Utility delete? and or Manage? (here)
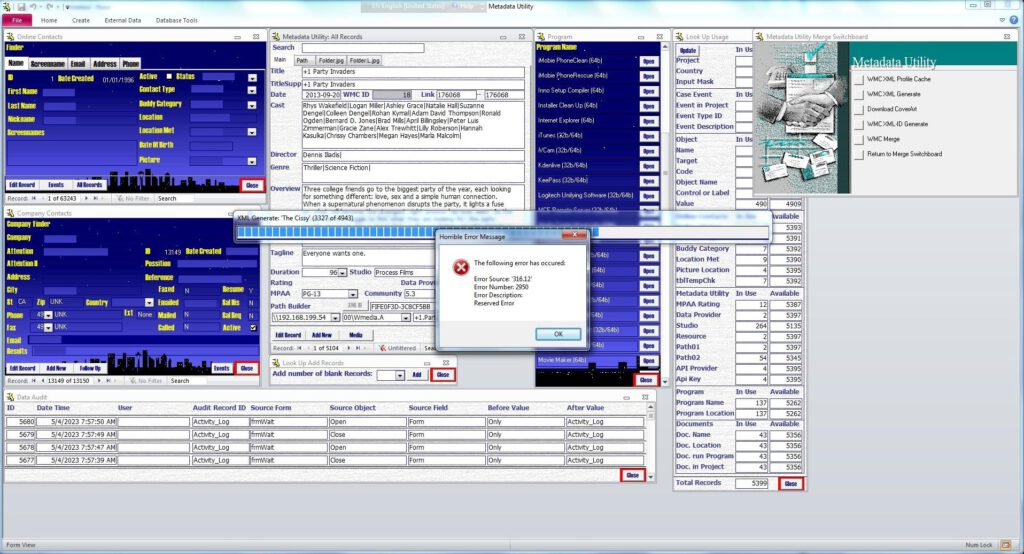
During the XML Generation you receive the following error:
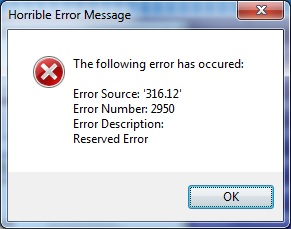
Cause:
Either Metadata Utility was installed in a custom location (outside of the default settings)
And / or
During a Batch Operation ie. XML Generation (Deletion, etc) an unexpected Network Time Out occurred and as a result the Batch Operation will terminate.
To resolve this issue, do the following:If Metadata Utility has been installed in a ‘Custom’ Configuration and thus it may have been installed in a ‘Non-Trusted’ Location, then see the Article in the link below and make sure the Path where Metadata Utility was installed is in a ‘Trusted Location’:
https://learn.microsoft.com/en-us/office/troubleshoot/access/error-running-macro
Verify the Case events on each of the records where the error was found (see suspect Queue to list all records found with an issue), and re-verify the Network Path is correct for the given Media (Movie, Series, etc) is correct and that Metadata Utility can access the Path, then, re-start the Batch Process ie. XML Generation, Deletion, etc again.
During the XML Generation you receive the following error:

Cause: At least one, non compliant Character for XML Formatting was found.
To resolve this issue, do the following:
-Review any ‘Suspect’ Records: ‘Case Events’ may provide additional information on the cause of the Error. For additional (here)
IMPORTANT – This consideration applies to all fields in within Metadata Utility.
Avoid having problems during XML Files Generation and/or Management by avoiding any of the following in within your Metadata Utility Record(s) (Data):
-double Quotes
-Single Quotes (even single quote such as ‘Email Address’ –see the single quotes– or, It’s own… –see the apostrophe after ‘it’. In such case, use instead “it is’ instead of ‘it’s’ WITHOUT using single quotes).
-Special Characters and/or Non-English Punctuation.
Metadata Utility is mainly built for an English Character Set. That said, we have had customers that use other languages such as -not limited to, listed in no particular order–: French, German, etc who have reported no issues while using Metadata Utility, even in their own language. Having said that, we have seen, in such cases where the above listed characters are found, that during the XML File Generation, that those generated XML Files may not be always properly formatted and thus cause problems in displaying that XML Metadata Information in Windows Media Center.
Note:
Curating/Cleaning Up/QRing your Data will ensure your Data is clean and readable and it is an essential, VERY important step to ensure the later creation of your Metadata Files (XML Files) works properly without errors.
Furthermore, should you need to have a detailed Troubleshooting of your XML Generation process, then it will be crucial that the Curating/QR process has been completed. Failure to ‘QR’/Clean Up the records in Metadata Utility may result in errors during the automated XML File generation (so it is either ‘do it now’ as you are inserting/downloading the information either using the ‘Metadata Utility Online Search Tool’ and/or manually entering the Data ie. ‘Adding a Movie Manually’ yourself, or ‘do it later’ as once you encounter errors in your XML Files, such as (not limited to, listed in no particular order): missing XML File Information, Windows Media Center not displaying the Metadata Information correctly, showing duplicate/’ghost’/non-existent Movies in your Windows Media Center Library, etc), then you will be forced to troubleshoot ‘why’/’which’ Record(s) are not beeing displayed properly.
IMPORTANT
Due to the limitations in Windows Media Center, avoid having problems during XML Files Generation and/or Management by avoiding any of the following in within your Metadata Utility Record(s) (Data):
-double Quotes
-Single Quotes (even single quote such as ‘Email Address’ –see the single quotes– or, It’s own… –see the apostrophe after ‘it’. In such case, use instead “it is’ instead of ‘it’s’ WITHOUT using single quotes).
-Special Characters and/or Non-English Punctuation.
As an example, avoid special Characters, such as (not restricted or limited to, listed in no particular order):
é
ö
Ã
ó
³
Mathematical symbols (for example): ¼ € ? P Ø Ý £ £ ø ý
Non Latin Languages or Characters (for example), Crylic (Russian), Greek alphabet, Arabic, Japanesse, Chinesse, etc
During an attempt to import Bulk Master/Child Record(s) you receive the following message:
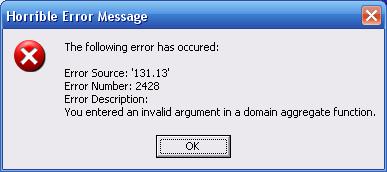
You entered an invalid argument in a domain aggregate function.
Cause: A badly formatted ‘MUWImp.xls’
For additional details See section
Metadata Utility – Operation – Bulk Import Process Master Records (BIPMR) (here)
Metadata Utility – Operation – Bulk Import Process Child Records (BIPCR) (here)
During an attempt to import Bulk Master/Child Record(s) you receive the following message:
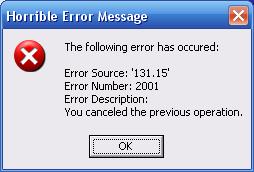
You canceled the previous operation.
Cause: An ‘invalid’ ‘MUWImp.xls’ File was used.
For additional details See section
Metadata Utility – Operation – Bulk Import Process Master Records (BIPMR) (here)
Metadata Utility – Operation – Bulk Import Process Child Records (BIPCR) (here)


MUWImp.xls Excel File contains 2 Spreadsheets:
| ztblWMC01Imp | ztblWMC02Imp |
ztblWMC02Imp – Formatting:
MasterTableID


Must be the Same Value as found in ztblWMC01Imp.ID Column
Though MasterTableID must be the same as found in ztblWMC01Imp.ID Column, this value must be Unique for Medatadata Utility – This value musts not already exist in Metadata Utility.
Same as ztblWMC01Imp.ID Column, This Value must correspond to the ‘Movie’ ID in The Movie Database (TMDB).
In the Case of a Show/Series, then the ID should have the following Format:
ShowID_SXX_EYY
ShowID – TMDB’s Show ID
SXX – Season Number
EYY – Episode Number
Example
ShowID: 1234
Season: 1
Episode: 7
The MasterTableID Value in ztblWMC02Imp then should be:
1234S01E07
For additional details See section
‘Metadata Utility – Description’ – ‘WMC ID’ (6) (here)
TiTleSup

Movie or Show Title as it will be displayed in Windows Media Center
For additional details See section
‘Metadata Utility – Description’ – ‘TittleSupp’ (4) (here)
PathID01


For additional details See section
‘Metadata Utility – Description’ – ‘Path Builder’ (21), (22), (23) (here)
PathID02

For additional details See section
‘Metadata Utility – Description’ – ‘Path Builder’ (21), (22), (23) (here)
Path03

For additional details See section
‘Metadata Utility – Description’ – ‘Path Builder’ (21), (22), (23) (here)


MUWImp.xls Excel File contains 2 Spreadsheets:
| ztblWMC01Imp | ztblWMC02Imp |
ztblWMC01Imp – Formatting:
ID

Must be Unique – This value can not already exist / be found in Metadata Utility.
This Value must correspond to the ‘Movie’ ID in The Movie Database (TMDB).
In the Case of a Show/Series, then the ID should have the following Format:
ShowID_SXX_EYY
ShowID – TMDB’s Show ID
SXX – Season Number
EYY – Episode Number
Example
ShowID: 1234
Season: 1
Episode: 7
The ID Value in ztblWMC01Imp then should be:
1234S01E07
For additional details See section
‘Metadata Utility – Description’ – ‘WMC ID’ (6) (here)
Title

Movie or Show Title
For additional details See section
‘Metadata Utility – Description’ – ‘Title’ (3) (here)
Year

YYYY-MM-DD
Example
2001-12-14
For additional details See section
‘Metadata Utility – Description’ – ‘Date’ (5) (here)
Cast

Should have the 20 Most Popular Cast Members.
For additional details See section:
‘Metadata Utility – Description’ – ‘Cast’ (8) (here)
‘Metadata Utility – Operation – Adding Movie Information (Automated)’ for proper Formatting and special characters to avoid (here).
Director

For additional details See section
‘Metadata Utility – Description’ – ‘Director’ (9) (here)
‘Metadata Utility – Operation – Adding Movie Information (Automated)’ for proper Formatting and special characters to avoid (here).
Genre

For additional details See section
‘Metadata Utility – Description’ – ‘Genre’ (10) (here)
‘Metadata Utility – Operation – Adding Movie Information (Automated)’ for proper Formatting and special characters to avoid (here).
Overview

For additional details See section
‘Metadata Utility – Description’ – ‘Overview’ (11) (here)
‘Metadata Utility – Operation – Adding Movie Information (Automated)’ for proper Formatting and special characters to avoid (here).
Tagline

For additional details See section
‘Metadata Utility – Description’ – ‘Tagline’ (12) (here)
‘Metadata Utility – Operation – Adding Movie Information (Automated)’ for proper Formatting and special characters to avoid (here).
Duration

In Minutes
For additional details See section
‘Metadata Utility – Description’ – ‘Duration’ (13) (here)
Studio ID

Must be the Studio-ID Found in Metadata Utility.
Make sure the Studio ID has already been entered in Metadata Utility
For additional details See section
‘Metadata Utility – Description’ – ‘Studio’ (14) (here)
To add, edit Studio(s):
Metadata Utility – How To – Initial SetUp – Studio (here)
Data Provider ID


Must be the Data Provider ID Found in Metadata Utility.
Make sure the Data Provider ID has already been entered in Metadata Utility
For additional details See section
‘Metadata Utility – Description’ – ‘Data Provider’ (15) (here)
To add, edit Data Provider ID(s):
Metadata Utility – How To – Initial SetUp – Data Provider (here)
MPAARatingID

Must be the MPAA Rating ID Found in Metadata Utility.
Make sure the MPAA Rating ID has already been entered in Metadata Utility
For additional details See section
‘Metadata Utility – Description’ – ‘MPAA Rating’ (16) (here)
To add, edit MPAA Rating ID(s):
Metadata Utility – How To – Initial SetUp – MPAA Rating (here)
Rating

Value given
For Example
7.6
For additional details See section
‘Metadata Utility – Description’ – ‘Community Rating’ (17) (here)
Provider Rating

Value given
For Example
7.3
For additional details See section
‘Metadata Utility – Description’ – ‘Provider Rating’ (18) (here)
Poster_Path

Name of the jpg file that you whish to have it displayed in Windows Media Center
Example:
Filename_Here.jpg
For additional details See section
‘Metadata Utility – Description’ – ‘Path’ – ‘Poster Path’ (30b) (here)
Backdrop_Path

Name of the jpg file
Example:
Filename_Here.jpg
For additional details See section
‘Metadata Utility – Description’ – ‘Path’ – ‘Poster Path’ (30c) (here)
Metadata Utility’s Shortcut Option are as follows:
| Command Title | Open | Command Syntax |
| W01 – Metadata Utility | Metadata Utility | /cmd W01 |
| W02 – Company Contacts | Company Contacts | /cmd W02 |
| W03 – Online Contacts | Online Contacts | /cmd W03 |
| W99 – Admin | Online Contacts Company Contacts Metadata Utility Programs Look Up Usage Add Records Data Audit | /cmd W99 |
Syntax:
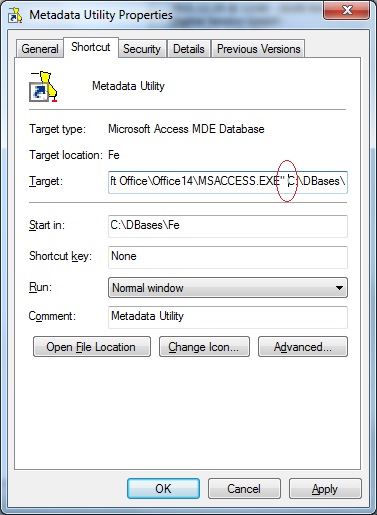
“Full_Path_to_Miscrosoft_Access_32_Bit” “Full_Path_for_Metadata_Utility” “/cmd CommandOptionHere”
To configure any of the above advanced Start-Up options:
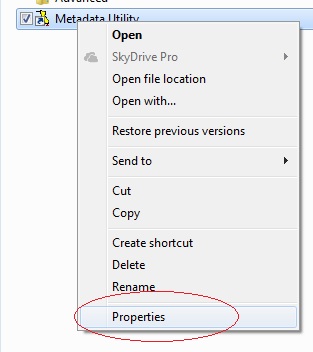
-right click on the Metadata Utility Shortcut and select ‘Properties’
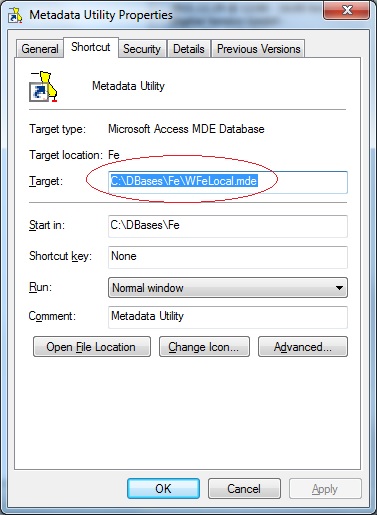
-in the ‘Target’ Section add the Full Path for Microsoft Access
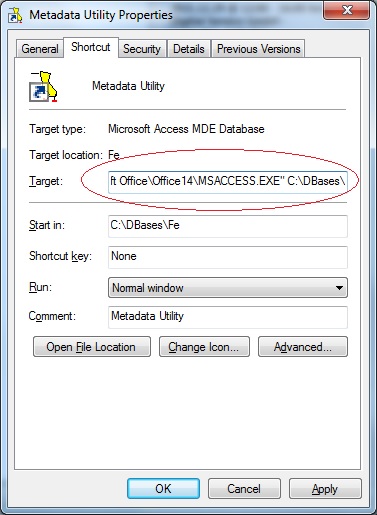
In the Example below, we are using Microsoft 2010 32 bit
Note:
Enclose Microsoft Access Full Path in double Quotes
Make sure there is a space between Microsoft Access Full Path and Metadata Utility’s Full Path
Metadata Utility requires Microsoft Access 32 Bit
-Enclose Metadata Utility’s Path in double Quotes
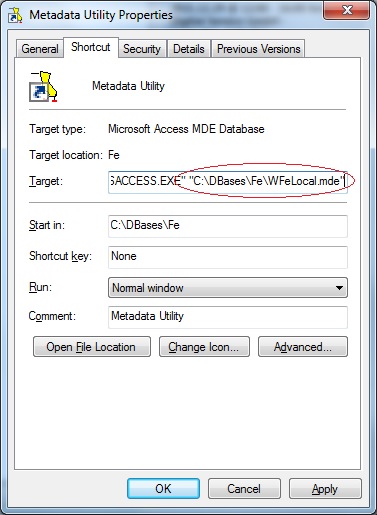
Note:
Make sure there is a space between Microsoft Access 32 Bit (Full Path) and Metadata Utility (Full Path)
-Add the desire Command (see above table).
For this example, we are adding the ‘Admin’ Command
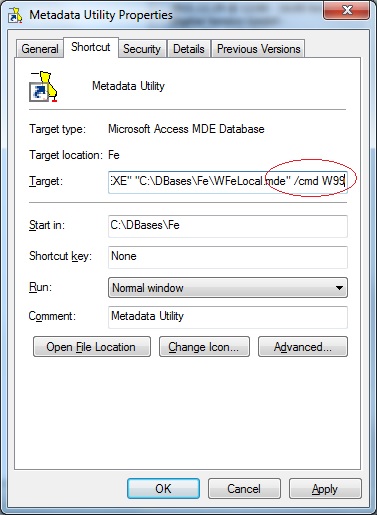
Note:
Make sure there is a space between Metadata Utility (Full Path) and the command
Make sure there is a space between /cmd CommandHere
Double check to make sure there is a space between the full path for Microsoft Access 32 Bit and the full path to Metadata Utility and the advanced command and as well a space between the command /cmd and the actual command option.
Example of the full Value that should be found in the ‘Target’ section in the Shortcut for Metadata Utility, including the Command Option (in the example below using using Microsoft Access 2010 32 Bit):
“C:\Program Files (x86)\Microsoft Office\Office14\MSACCESS.EXE” “C:\DBases\Fe\WFeLocal.mde” /cmd W99
In the above example, Metadata Utility is using a path to Microsoft Access 2010 32 Bit. As described on the Command Options Table ‘W99’ (without the single quotes) will automatically open each time Metadata Utility is opened, regardless of which user is logged on and regardless if there is a Profile defined in within Metadata Utility, the following Windows:
Online Contacts
Company Contacts
Metadata Utility
Programs
Look Up Usage
Add Records
Data Audit
For more information on how to create a ‘Profile’ in Metadata Utility see ‘StartUp Management’ click here
For more information of the minimum requirements for Metadata Utility click here
After a Media Data Migration (ie. from a Share to another Share, From one NAS to another NAS, etc) and after updating the information in Metadata Utility and Generating NEW XML Files and synchronizing them with Windows Media Center some of the following issues are seen:
-Album Covers are NOT shown and/or
-When clicked in Windows Media Center, a Message is displayed that Windows Media Center ‘cannot find the movie in the DVD drive’ (even though the Media ie. Movie, Series, etc) resides on a Share Partition (or NAS Share Partition).
Cause:
-Windows Media Center is still using/looking for the Media on the ‘old’ location, prior to the migration.
-Information has not been properly update in Medata Utility
To resolve this issue, do the following:
- Verify the new location has been updated in Meatadata Utility
See section: Metadata Utility – Description – ‘Path’ (click here) - For advanced users:
see section: Metadata Utility – Operation – Bulk Update Process (BUP) (click here)
Once completed, then follow each of the steps as described in section: Metadata Utility – Operation – Reports (click here)
Additional Information:
Metadata Utility – How To – Movie CoverArt (Thumbnail ‘Folder.L.jpg’) Verification (click here)
Metadata Utility – How To – Movie CoverArt (Thumbnail ‘Folder.jpg’) Verification (click here)
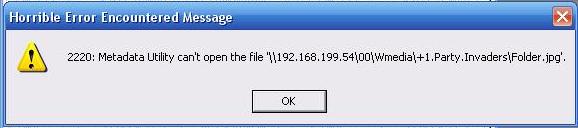
Error 2220 – Can’t see Coverart (Folder.jpg/Folder.L.jpg) (click here)
Windows Media Center Coverart (click here)
Metadata Utility – Operation – Bulk Update Process (BUP) (click here)
Metadata Utility – Case Studies – Managing Data Migration(s) from ‘Old’ (Source) location to a ‘New’ (Target) Location (click here)
Download the Application (and/or applicable File ie. ‘BackEnd’)
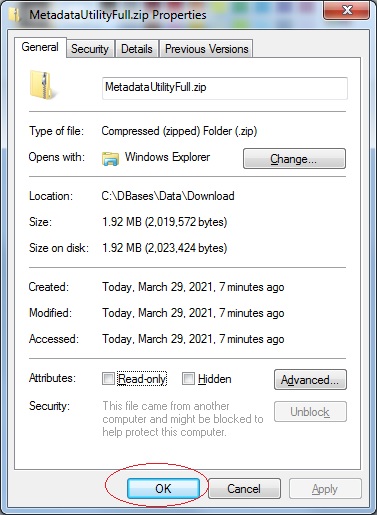
-Exit our of Metadata Utility (applicable for upgrade on existing installations) -Download the appropriate Package (either Metadata Utility Full Version or Metadata Utility Update Version) to your Desktop. -After the download has completed, then -Right click on the downloaded file and select ‘Properties’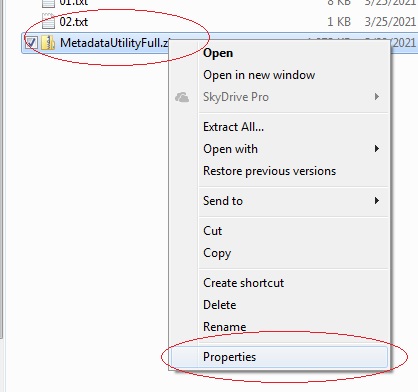
-Click on ‘Unlock’
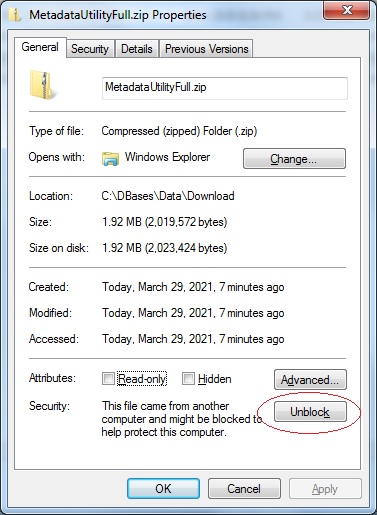
-Click on ‘Apply’
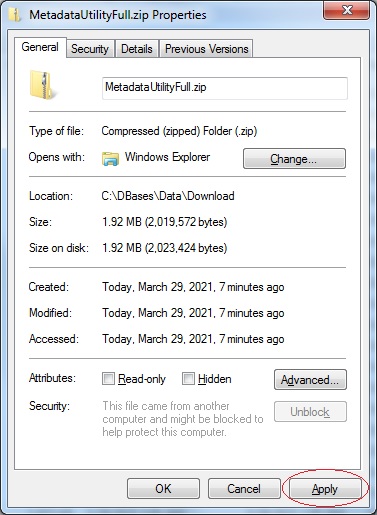
-Click on ‘Ok’ to Close the Properties dialog for the downloaded file
-After the download has completed, extract the contents of the Zip file (either double click on the file or right mouse click on the file and select ‘extract’).
Automated Installation
-Double click to run the Installer (EXE) file.
-Follow the Installer Wizard Prompts.
-Once completed, click ‘Finish’ to launch Metadata Utility.
Manual Installation – Advanced Users Only
-Move the extracted File(s) to the appropriate location:
BackEnd Files Default Location
BackEnd-Template Files Default Location
C:DBasesData
C:DBasesDataMsSQLBACKUP
-Once completed, launch Metadata Utility.
For more information about Metadata Utility’s BackEnds clickhere
During Metadata Download you receive the following message:
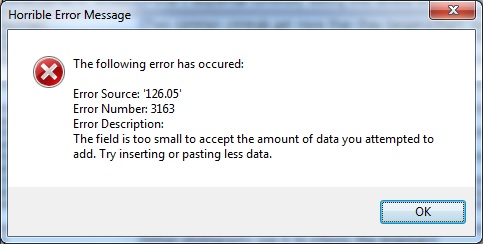
The field is too small to accept the ammount of data you attemped to add. Try insterting or pasting less data.
Cause: depending on the ammount of Data (ie. Movies searched/downloaded), network traffic, internet speed connection and a different subset/combination of factors, Metadata Utility will display such a message when the Data beeing transmitted experiences a Timeout.
To resolve this issue, do the following:
-Perform a more concise search for the Movie in question. For Example, Search for ‘007 Dr. No’ (without the single Quotes) instead of ‘Dr. No’ (still without the single Quotes)
During Metadata Download you receive the following message:
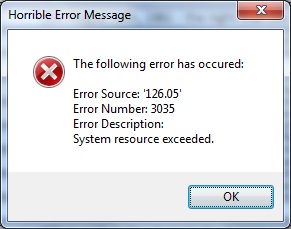
System Resources Exeeded
Cause: depending on the ammount of Data (ie. Movies searched/downloaded), network traffic, internet speed connection and a different subset/combination of factors, Metadata Utility will display such a message when the Data beeing transmitted experiences a Timeout.
To resolve this issue, do the following:
-Perform a more concise search for the Movie in question. For Example, Search for ‘007 Dr. No’ (without the single Quotes) instead of ‘Dr. No’ (still without the single Quotes)
After completing an update to a new version and/or an incorrect shutdown, ie. Metadata Utility was abnormally closed you receive the following error:

Cause: After an Upgrade and/or an incorrect shutdown, ie. Metadata Utility was abnormally closed which may cause BackEnd(s) to be left in an improper shutdown stage.
To resolve this issue, do the following:
-Exit Properly out of ‘Metadata Utility’ using the Exit Button (Main Switchboard)
-If ‘Metadata Utility’ is installed in a Network environment, make sure no other users are currently connected to any of the BackEnds, then
-Open ‘Metadata Utility’ again (‘Metadata Utility’ will automatically attempt to repair any BackEnds that may have been improperly closed).
During an attempt to install MsOffice 2010 you receive an Error:
‘MsOffice 2010 Error 1402 setup cannot open the registry key Unknown\components’.
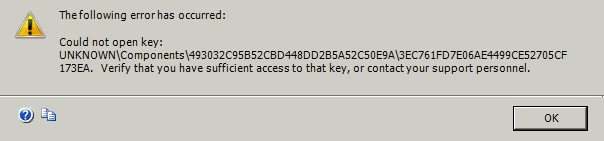
To resolve this issue, do the following:
-Microsoft Office 2010 FixIt Tool
-Download and Install ‘Microsoft Office 2010 FixIt Tool’ to remove any left over components from a prior MsOffice installation and/or repair the registry.
https://support.microsoft.com/en-us/office/repair-an-office-application-7821d4b6-7c1d-4205-aa0e-a6b40c5bb88b?ocmsassetid=ha010357402&ctt=1&correlationid=8bfaf910-6d5f-4252-b5bb-0ed67d5d4349&ui=en-us&rs=en-us&ad=us
-Run Tool to remove MsOffice 2010 completely. Once completed (PC will need to be rebooted after the tool is finished with the cleanup/deinstallation), then
-Reboot PC after MsOffice 2010 removal has been completed (this step is very important), then
-After CleanUp Tool has been completed (ie. MsOffice has been uninstalled and PC has been rebooted), then
-Open the Command Prompt (Admin rights) (ie. Start – Run – Cmd – Ok (click))
-Copy and paste the following Command:
secedit /configure /cfg %windir%\inf\defltbase.inf /db defltbase.sdb /verbose
-Once the command has completed running (you will see the DOS Command Prompt back to the C:\ Prompt, then
-Install MsOffice 2010 again, then
-Install Language Packs (if needed), then
-Install the latest Service Pack ie. Service Pack 1, Service Pack 2, etc
During an attempt to install the latest Service Pack, you receive a Message:
‘Microsoft Access 2010 32 Bit Service Pack an Error occurred during the detection’ or ‘Setup detected legacy groove’, then the installation fails/terminates
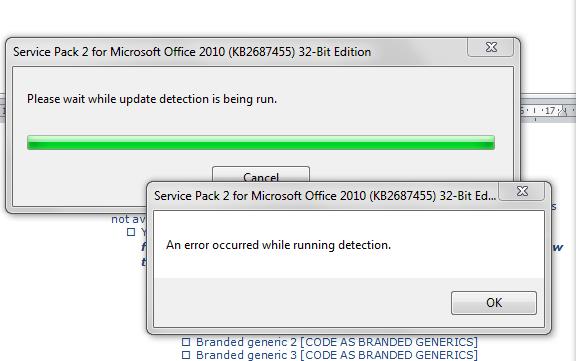
Solution:
-Repair MsAccess/Office Installation
-If unable (due to Error 2424, 2425, or repair fails), then
-Microsoft Office 2010 FixIt Tool
-Download and Install ‘Microsoft Office 2010 FixIt Tool’
https://support.microsoft.com/en-us/office/repair-an-office-application-7821d4b6-7c1d-4205-aa0e-a6b40c5bb88b?ocmsassetid=ha010357402&ctt=1&correlationid=8bfaf910-6d5f-4252-b5bb-0ed67d5d4349&ui=en-us&rs=en-us&ad=us
-Run Tool to remove MsOffice 2010 completely. Once completed (PC will need to be rebooted after the tool is finished with the cleanup/deinstallation), then
-Reboot PC after MsOffice 2010 removal has been completed (this step is very important), then
-Install MsOffice 2010 again, then
-Install Language Packs (if needed), then
-Install the latest Service Pack ie. Service Pack 1, Service Pack 2, etc
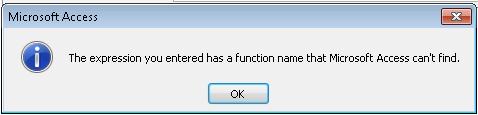
‘Metadata Utility’ fails to open and you receive the following message:
‘The expression you entered has a function name that Microsoft Access can’t find’
‘The expression you entered has a function name that database can’t find’

Solution:
Latest Service Pack is needed (ie. Service Pack 2 (SP2) or later needed)
‘Metadata Utility’ fails to open and you receive the following message:
‘The expression you entered has a function name that Microsoft Access can’t find’
‘The expression you entered has a function name that database can’t find’
Solution:
Latest Service Pack is needed (ie. Service Pack 2 (SP2) or later needed)
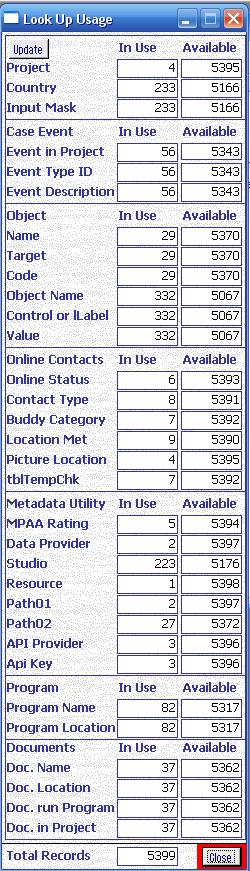
Metadata Utility allows you to control the Name for the different Windows in within Metadata Utility as well as the Field Names, Buttons and Reports. This feature allows for users who want to use their own language or simply want to change the name of any given Object to their own Naming Convention of their choice.
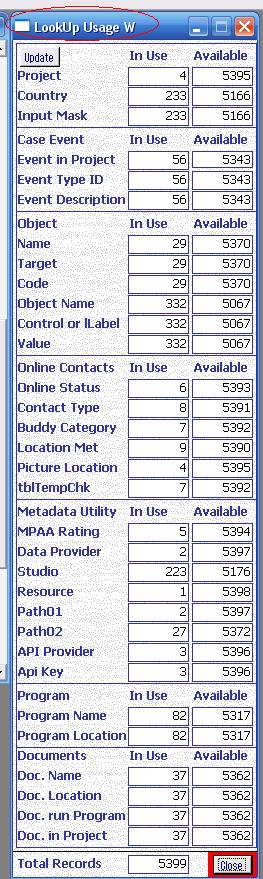
In this example, we are going to change the Name of ‘Look Up Usage’ to ‘Look Up Usage W’ (notice the ‘W’ at the end of the title)
Before
After
Steps as follow:
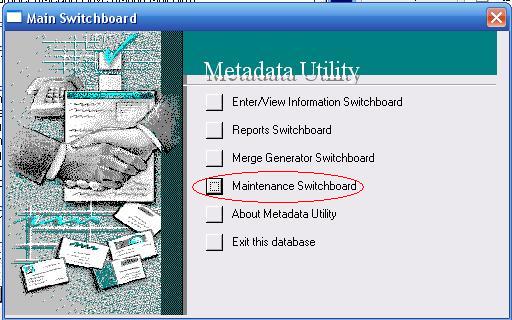

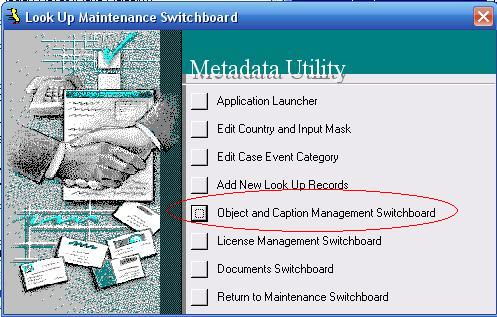
Switchboard – Maintenance Switchboard (click) – Look Up Maintenance Switchboard (click) – Object Maintenance (click)
Look Up Usage – Click to select – then close ‘Object Maintenance’
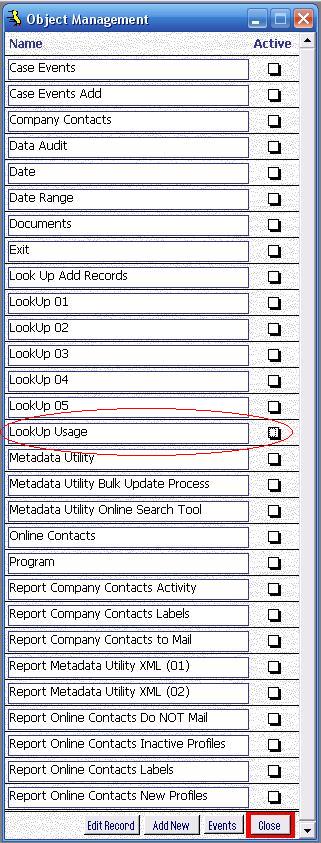
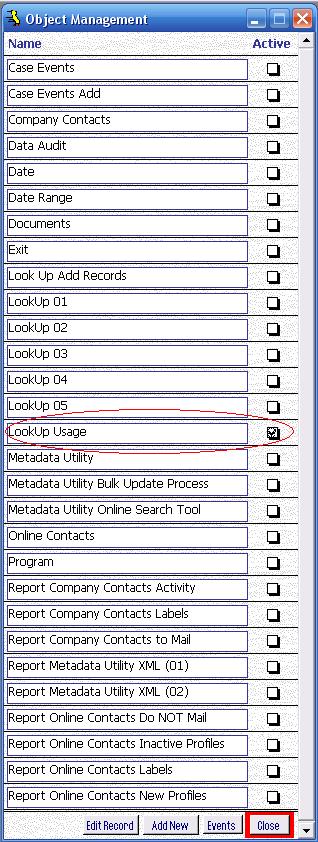
Close ‘Object Maintenance’.
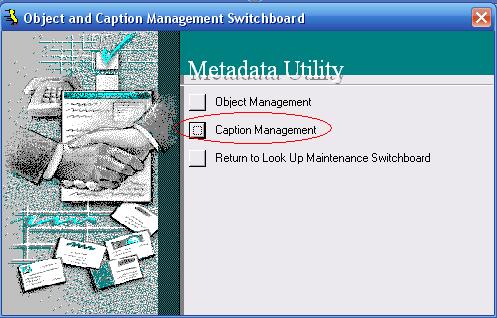
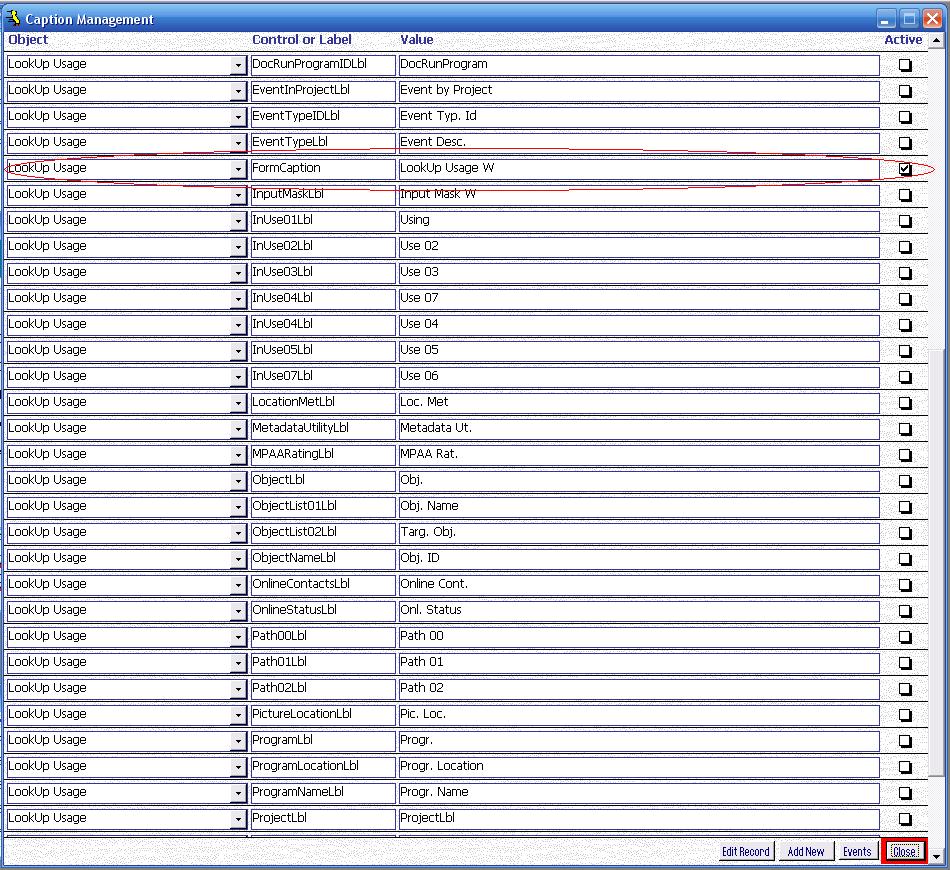
‘Caption Management’ (click)
Find
Object: Look Up Usage
Control or Label: FormCaption
Value: Look Up Usage W
Click to activate, then close ‘Caption Management’
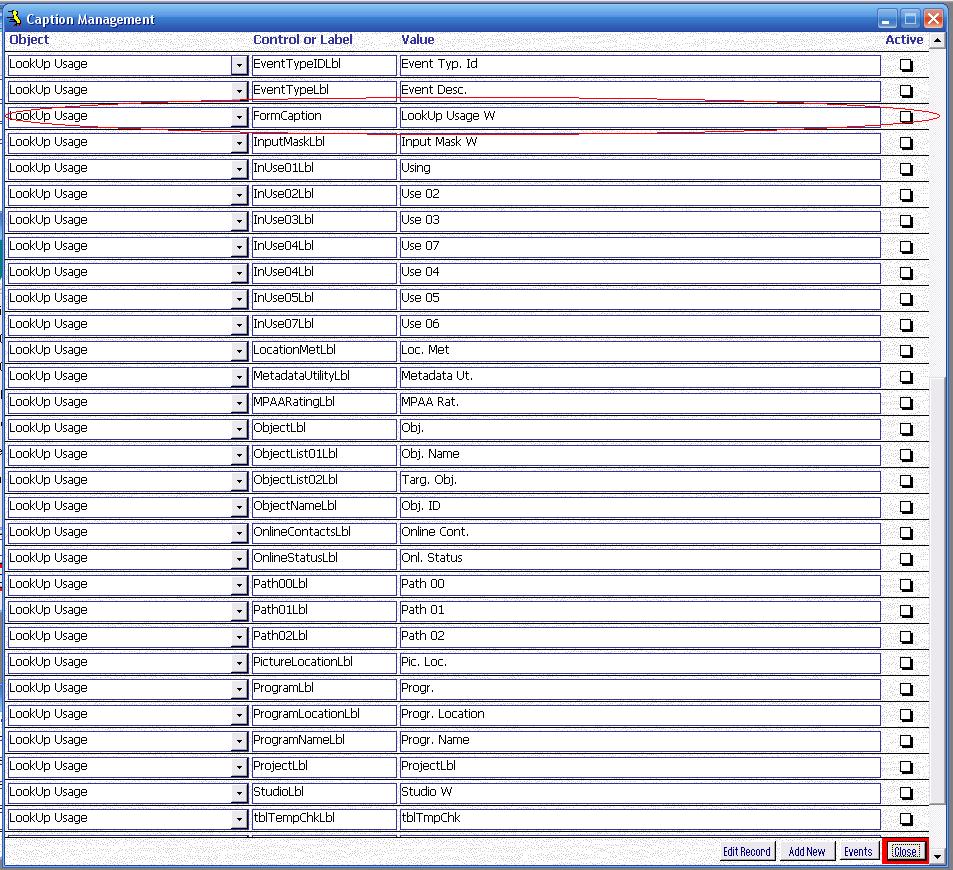
‘Look Up Usage’ will display it’s new Name:
You can repeat the above steps to change the Caption of any other Fields as needed.
Note: Metadata Utility comes with a pre-built list of the available Objects that can be managed. This feature enables you to Change the Naming on most Reports, Forms, Controls and Buttons and can be useful is there should be a need to re-name a particular Object and/or even change the Name that is shown to a different language (the default Language is English).
For additional Information, see sections:
Metadata Utility – Operation – Object Management click here.
and
Metadata Utility – Operation – Caption Management click here.
For a complete list of all available Fields, see our Q&A section (Q&A -Object Management List) we have a complete List of all available Objects, Labels, Controls, Buttons that are available for control, namely the original pre-built List that was originally installed with a default installation of Metadata Utility click here.
Metadata Utility’s ‘Data Audit’ allows you to audit the changes you make in within Metadata Utility.

To Enable/Disable ‘Data Audit’, do the following:
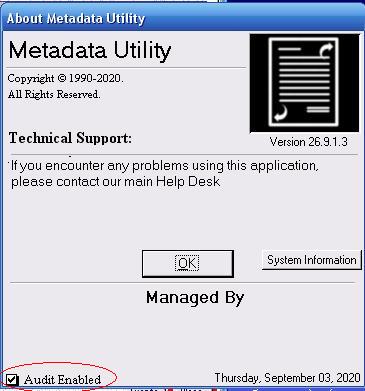
Enable ‘Data Audit’
From the Main Switchboard, click ‘About Metadata Utility’ – Select (check) ‘Audit Enabled’
Disable ‘Data Audit’
From the Main Switchboard, click ‘About Metadata Utility’ – Un-Select (un-check) ‘Audit Enabled’
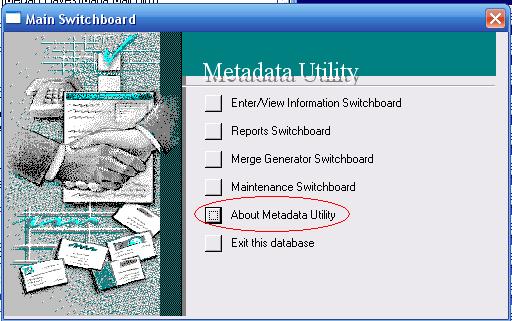
(Picture showing ‘Data Audit’ Enabled).
Metadata Utility’s ‘Look Up Usage’ allows you to see the distribution and usage in within all ‘Look Up’ Lists/Records
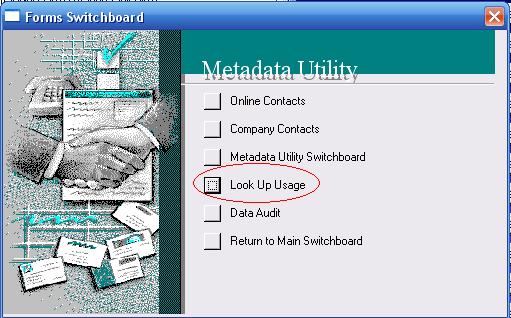
For additional information, see section: Metadata Utility – Maintenance – Look Up – Add New Look Up Records click here.
Pending Records are Pre-Downloaded ‘Master Metadata Information’ that has not been (yet) added to your Windows Media Center Library.
In other words, you don’t have that Movie in your Library, however, you had pre-downloaded the information for that movie and were expecting to add that movie to your Windows Media Center Library.
Should there be a need to delete ‘Pending Record(s)’, then do the following:
-enter each Pending Record that you want to delete as if the record will now be entered into your Metadata Library (for more information see section: ‘Pending’ Queue as well as ‘Metadata Utility – place Record(s) in the ‘Selected Records’ Queue’).
-once the ‘Pending Records’ have been entered in your Metadata Library, then,
-select those records that you want to delete by placing those, just added records in the ‘Selected Records’ Queue, then
-Delete Master Records (for additional Information, see section: -Metadata Utility Maintenance Main Switchboard – Metadata Utility Maintenance Delete Switchboard -Delete Master Records (and) -Delete Orphan Records).
Allows you to Open/Launch other Programs directly from Metadata Utility.
For additional Information, see section:
-Metadata Utility – Maintenance – Look Up – Application Launcher click here.
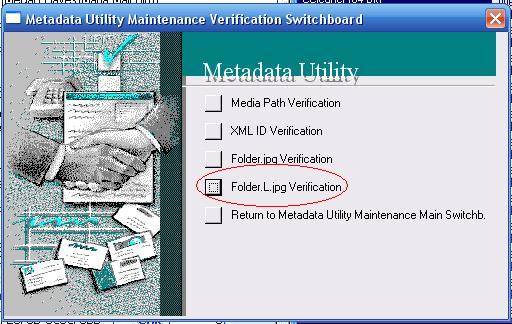
Allows you to verify the ‘Folder.L.jpg’ File.
For additional Information, see section:
-Metadata Utility Maintenance Main Switchboard – Metadata Utility Maintenance Verification Switchboard
-Folder.L.jpg Verification click here.
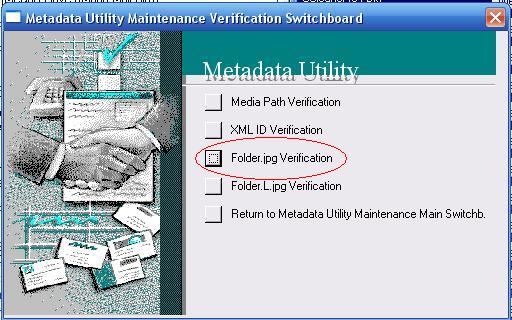
Allows you to verify the ‘Folder.jpg’ File.
For additional Information, see section:
-Metadata Utility Maintenance Main Switchboard – Metadata Utility Maintenance Verification Switchboard
-Folder.jpg Verification click here.
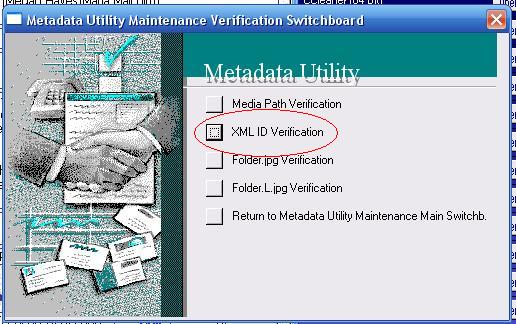
Allows you to verify the formatting of Metadata Utility’s XML ID(s).
For additional Information, see section:
-Metadata Utility Maintenance Main Switchboard – Metadata Utility Maintenance Verification Switchboard
-XML ID Verification click here.
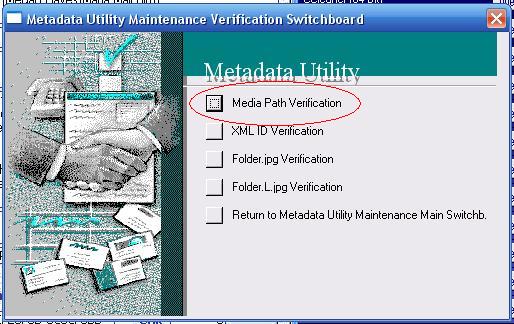
Allows you to verify the Movie Path that you have built using Path Builder.
For additional Information, see section:
-Metadata Utility Maintenance Main Switchboard – Metadata Utility Maintenance Verification Switchboard
-Media Path Verification click here.
In those cases where (to list a few possible causes, not limited to, listed in no particular order):
-Windows Media Center Local Profile Metadata Cache is corrupt,
-Windows Media Center Metadata Information is not being shown properly,
-Windows Media Center is showing ‘Phantom’ Movies (ie. and/or movies no longer found in your Windows Media Center Library),
-you have exhausted your research and cannot find a cause/solution for the issues in your Windows Media Center Metadata Library, then this option may be the best solution.
Steps are as follows:
01 – from the Main Switchboard
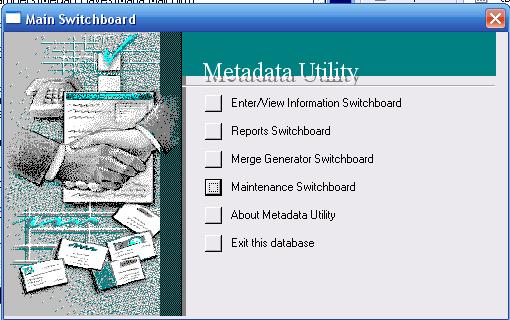
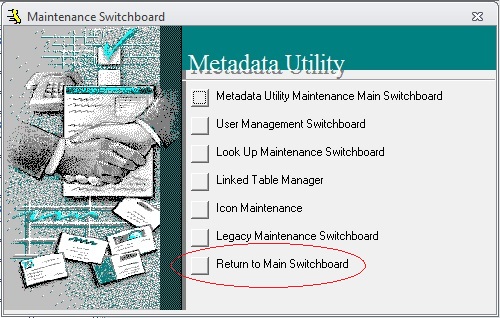
02 – click on ‘Maintenance Switchboard’
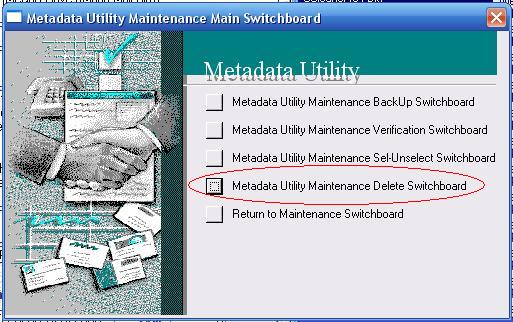
03 – click on ‘Metadata Utility Maintenance Main Switchboard’

04 – click on ‘Metadata Utility Maintenance Delete Switchboard’
05 – click on ‘Delete Windows Media Center Cache’
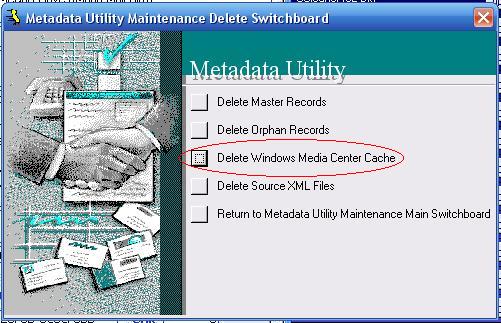
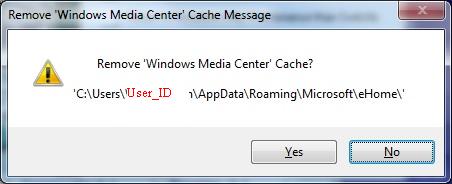
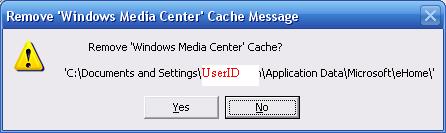
-Select ‘Yes’ to Delete the ‘Windows Media Center Metadata Cache’ from your Local Profile. Once completed,
06 – click on ‘Return to Metadata Utility Maintenance Main Switchb.’

07 – click on ‘Return to Maintenance Switchboard’
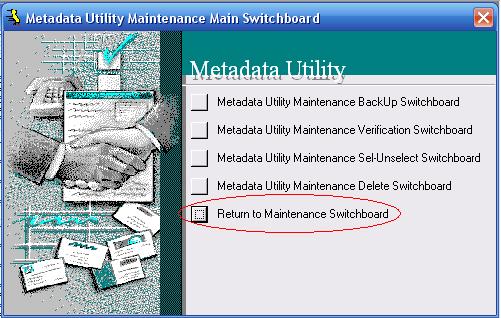
08 – click on ‘Return to Main Switchboard’
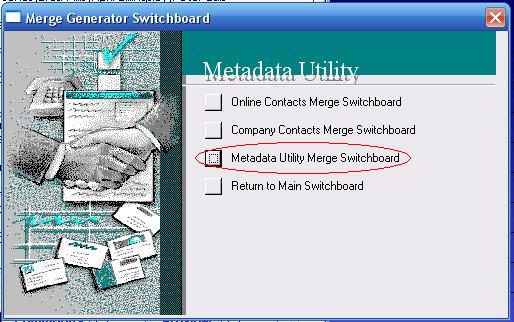
09 – click on ‘Merge Generator Switchboard’

10 – click on ‘Metadata Utility Merge Switchboard’
11 – click on ‘WMC XML Profile Cache’
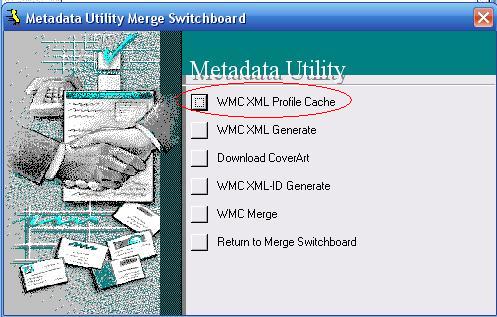
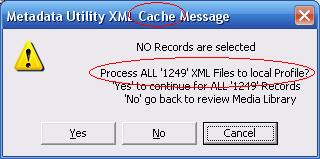
Click ‘Yes’ to Cache All Records to your Local Profile
Note: If ‘no’ records were pre-selected, then Metadata Utility will prompt you to automatically select all records and Cache all records to your Local Profile.
For Additional Information, visit Section: Metadata Utility – Operation – Delete Windows Media Center Cache click here.
This is a neat feature of Metadata Utility, that shows you how extremely flexible and robust Metadata Utility really can be, especially for those advanced users that like to use Keyboard shortcuts and/or right mouse clicks to sort the Data.
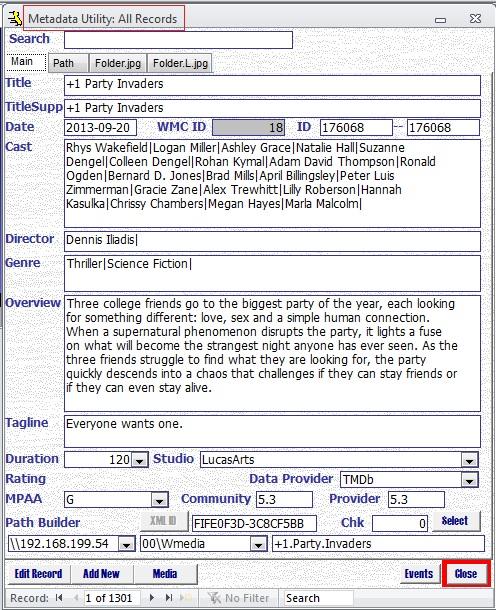
In this example, we will use Metadata Utility’s Advanced Commands to show ‘all’ records without using the ‘Media’ Button by clicking through the different Queues until we reached the ‘All Records’ Queue.
-Search for a Movie (any movie), regardless if that Movie is in any Queue (Media, Pending, Suspect, Orphan)
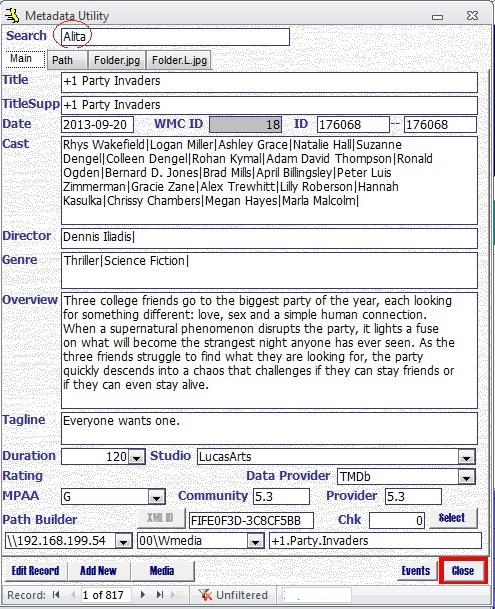
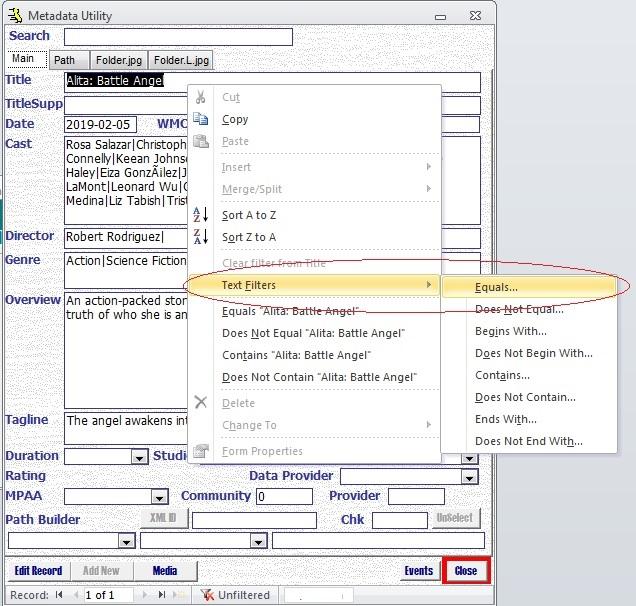
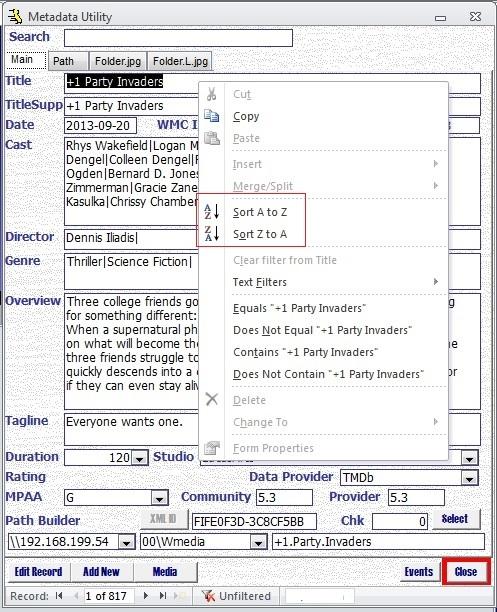
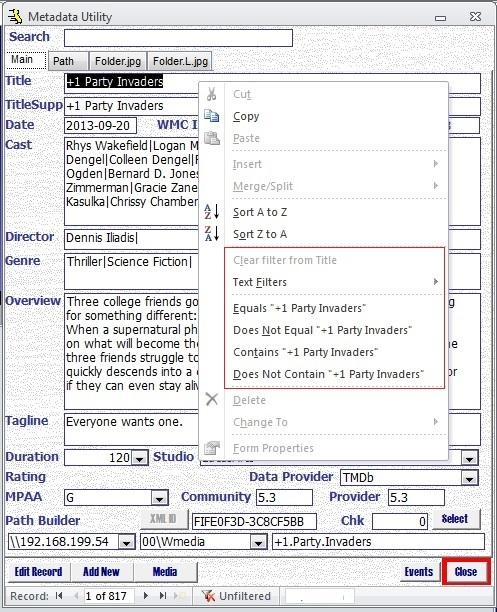
-Right click on a Field that has data populated and select ‘Text Filters – Equals’ and on the Pop-Up box type an asterisk ‘ * ‘ (without spaces, without single quotes) – click ok
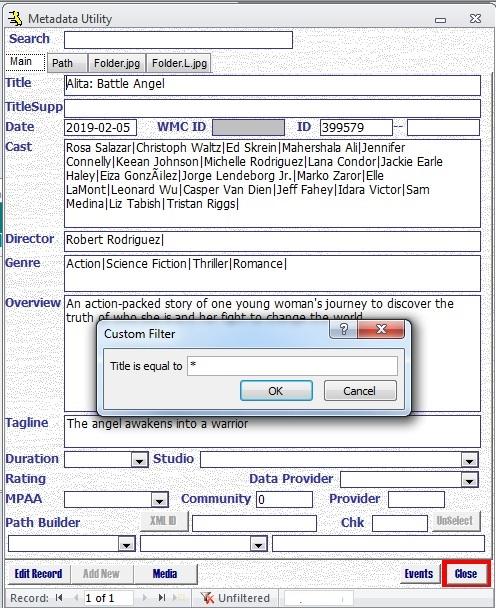

Though you’ve technically have applied an ‘Advanced Filter’, the asterisk ‘ * ‘ (without spaces, without single quotes) equals to ‘all’ (in other words it causes Metadata Utility to show ‘all’ records, though still in a ‘Filter’ mode).
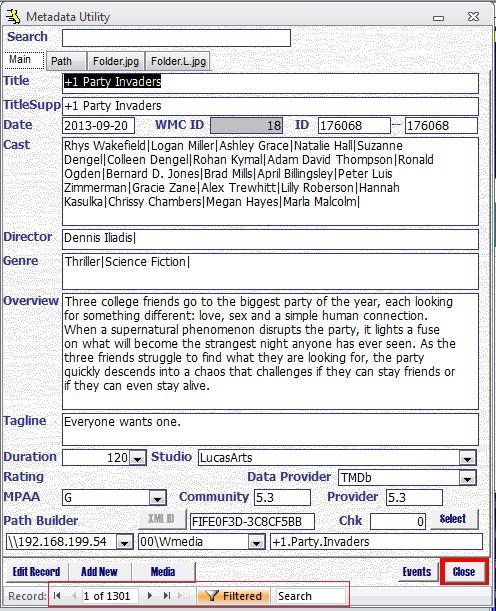
If you still don’t want to see the ‘Filter’ Activated at the bottom of Metadata Utility, but still want to keep all records, then you can right click on the same field you just used to apply the filter in the first place and select ‘clear filter’ (on the given field, which in this case is the ‘Title’ Field)
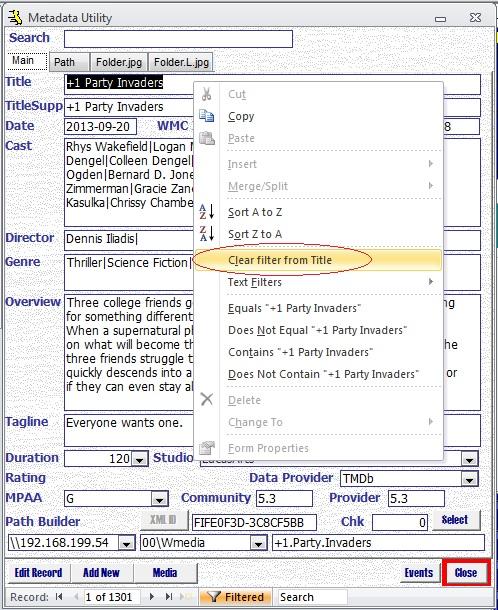
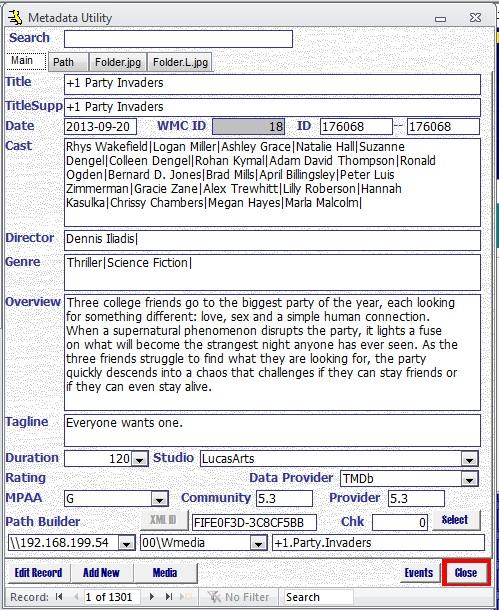
Metadata Utility will now show ‘all’ records, without an ‘Advanced Filter’ applied and without having cycled through the ‘Media’ Button to the ‘All Records’ Queue.
You can use the right click functionality in any field in Metadata Utility to:
-Re-Sort your Records (Ascending/Descending order)
-Apply/Remove an Advanced Filter
This advanced functionality allows you to easily sort and manage your Media Information in Metadata Utility.
For this example, we want to filter all movies that are stored in the ‘Zz\Wmedia’ Share.
-In Metadata Utility click the ‘Media’ Button 6 Times to cycle through all the Queues until you reach the Queue ‘All Records’.
-Options
-Record Selector Button – Navigate until you reach a Record that has in the Path Builder 02 the Value ‘Zz\Wmedia’ (without the single quotes).
-Best Option – Advanced Filter Search Enter the parameter we are looking for in this example: ‘Zz\Wmedia’ (without the single quotes).
Option – Record Selector Button – Navigate until you reach a Record that has in the Path Builder 02 the Value ‘Zz\Wmedia’ (without the single quotes)

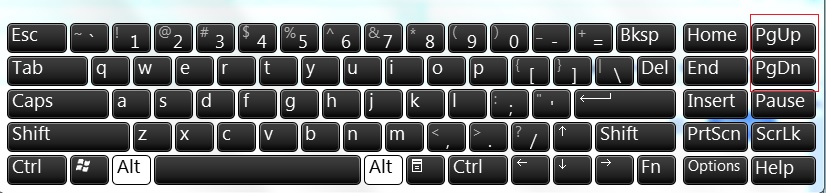
-Page Up and Down in your Keyboard – until you reach a Record that has in the Path Builder 02 the Value ‘Zz\Wmedia’ (without the single quotes)

Option – Best Option – Advanced Filter Search Enter the parameter we are looking for in this example: ‘Zz\Wmedia’ (without the single quotes)

As soon as you enter the Value ‘Zz\Wmedia’ (without the single quotes) in the Advanced Filter Search Field, you will notice that Metadata Utility will go directly to the first Record that meet the Criteria
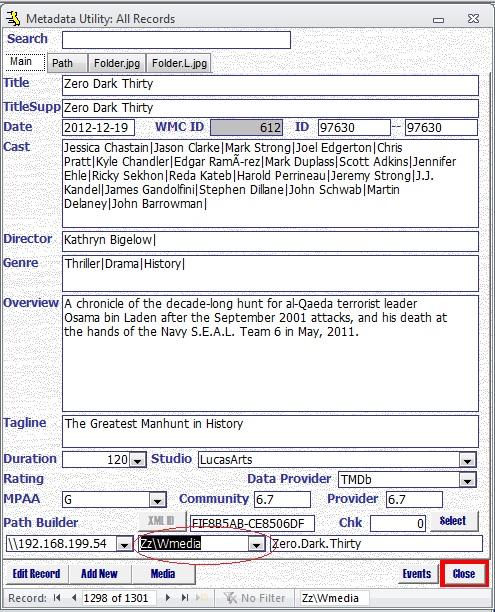
Once you are on a the Record that contains the Value that in this example we are looking for ‘Zz\Wmedia’ (without the single quotes), then:
-Right click on the ‘Media Builder 02’ Field and select
-Equals ‘Zz\Wmedia’
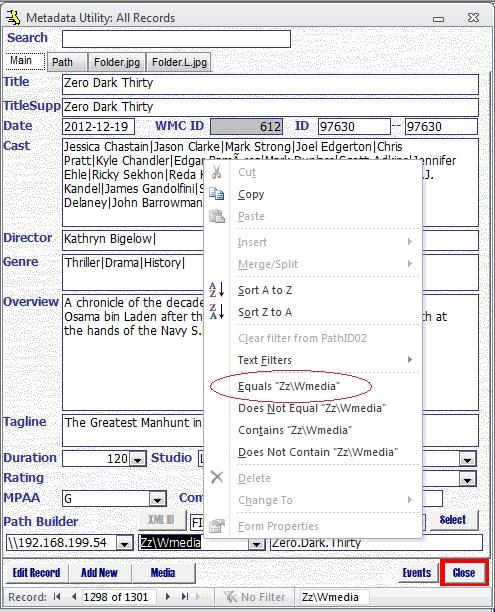
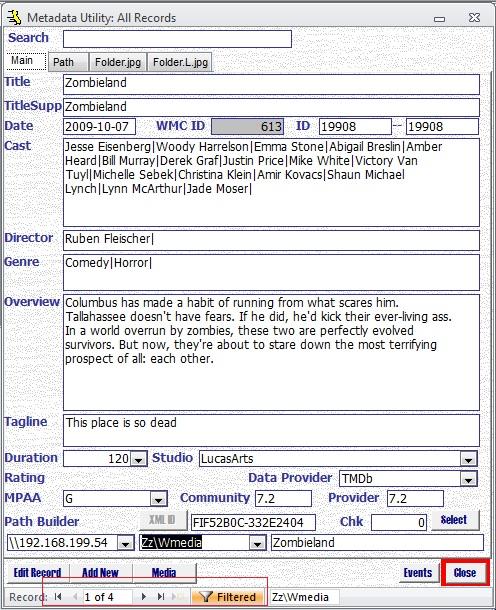
You will notice that immediately Metadata Utility will Filter and show only the records that Match ‘Zz\Wmedia’.
You will also notice that though you are still in ‘Metadata Utility: Show All Records’ Queue, however due to the Advanced Filter we just applied, now even in the ‘Metadata Utility: Show All Records’ Queue, you will ONLY have showing all records that match ‘Zz\Wmedia’
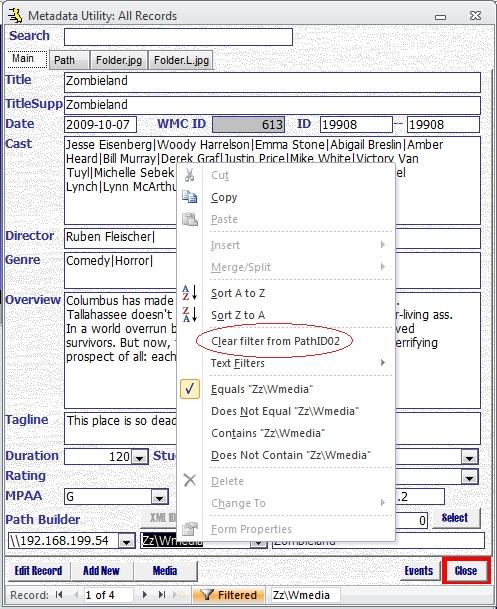
If you want to remove the Filter and go back to see ‘All Records’ you have (also) options:
-Navigate to each Field that you have applied a Filter (yes, you can apply multiple Filters on multiple Fields), then
-right click and select (for this example) ‘Clear Filter on PathID02’ to go back to see all records again
or
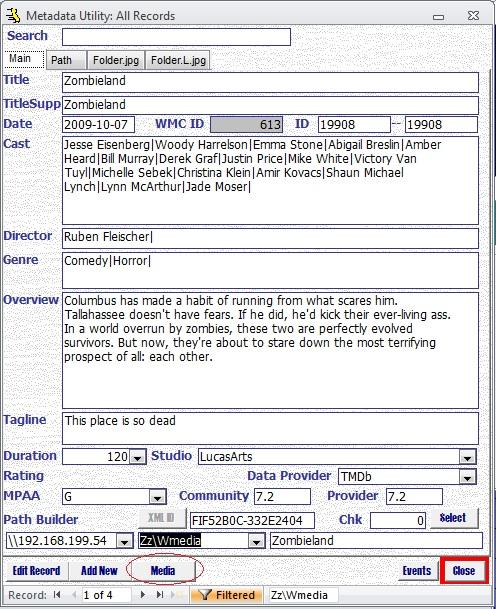
Simply using the Metadata Utility’s ‘Media’ Button, click again to cycle through until you reach the ‘All Records’ Queue again, ie. ‘Media’ Button 6 Times to cycle through all the Queues until you reach the Queue ‘All Records’.
Alternative, if you use Metadata Utility’s main ‘Search’ function (found on the top of Metadata Utility) to search for any other Movie in your Metadata Utility, the Advanced Filter will also be automatically reset/removed.
Note:
After removing an ‘Advance Filter’, there still may be any valued you may have typed in the ‘Advance Search’ Box at the bottom in Metadata Utility still visible. This however, does not have any impact on either the operation (Search, Filters, etc) and other commands that you may execute in Metadata Utility.
Upon installation, there are a few Settings to SetUp:
Metadata Utility
-License Management
Metadata Utility
Allows you to Register the License(s) of the purchased Feature(s), ie. ‘Windows Media Center’ Metadata ‘XML’ Management, etc

Metadata Utility
To access ‘License Management” follow these steps:
From the Main Switchboard, click on ‘Maintenance Switchboard’
click on ‘Look Up Maintenance Switchboard’
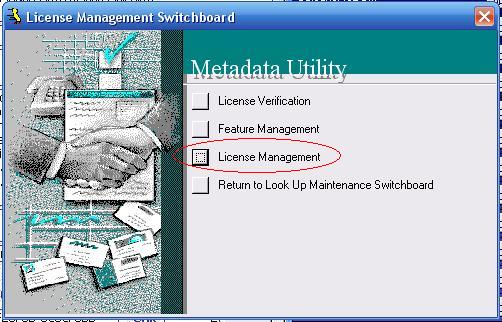
click on ‘License Management Switchboard’
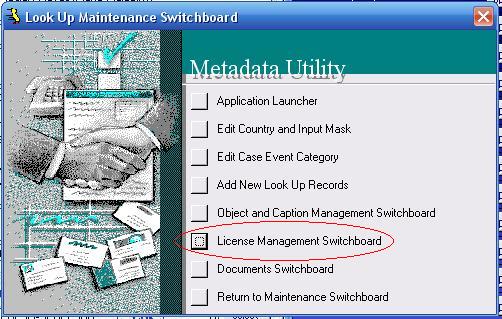
click on ‘License Management’
-Register New License
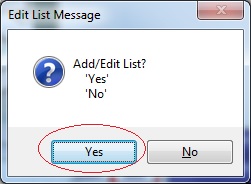
click on ‘Add New’
click ‘Yes’ to continue or ‘No’ to cancel
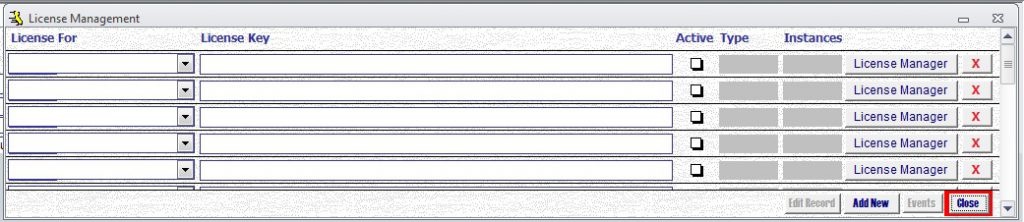
double click to edit record

Select the Stage to register

click on ‘License Manager’

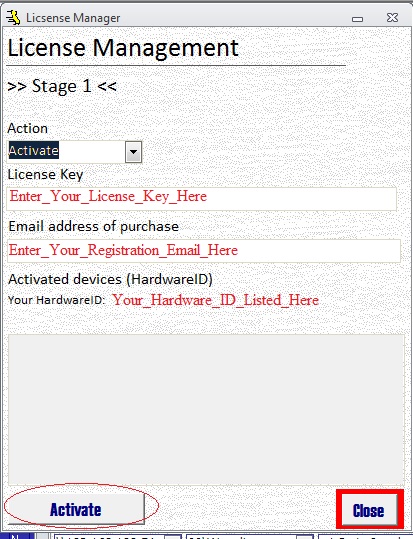
-Select ‘Activate’
-Enter the License Key
-Enter the registered Email Address
-click ‘Activate’
Confirmation upon successful registration
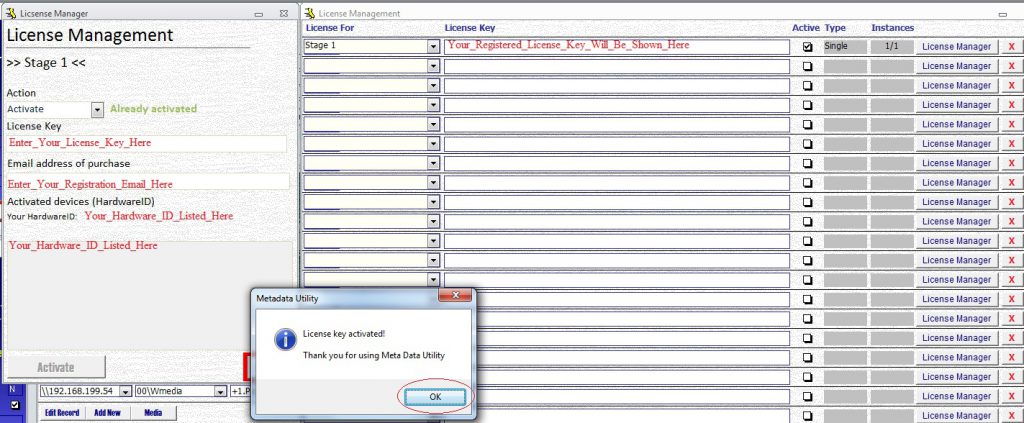
-Click ‘ok’ on the confirmation Message
-click ‘Close’ to close ‘License Manager’
-click ‘Close’ to close ‘License Management’ or, continue to register other Stage Licenses (ie. Stage 2, Stage 3, etc)
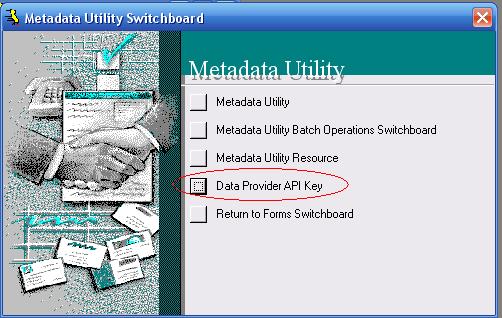
-Data Provider API Key Management
In order to use ‘Metadata Utility Online Search Tool’, ie. to search online and download movie(s) information, you will need to register a Search Provider. Metadata Utility uses ‘The Movie Database’ as the main search provider for movie information.
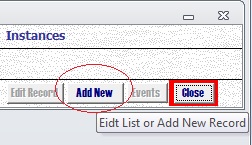
Click ‘Add New’
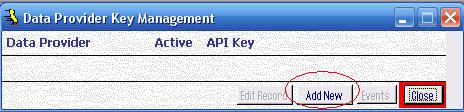
Click ‘Yes’ to Edit List
Double Click to Edit
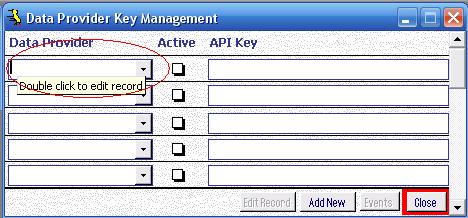
Select ‘TmDb’ + Enter Your Data Provider API Key
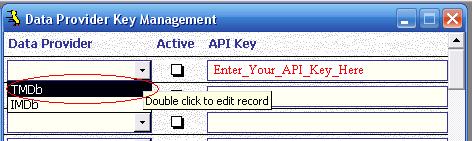
Click on ‘Active’ to activate your API Key
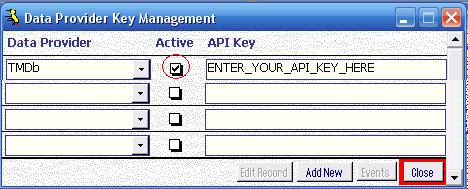
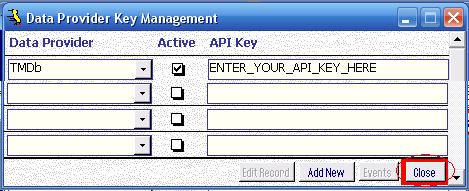
Click ‘Close’
Note: Enter ‘The Movie Database’ API Key – Make sure that you select only one single entry as ‘Active’ (in case you had multiple API Keys, even from the same Provider, then select only one API Key active. You can enter as many keys as you want, just make sure all other ones are NOT selected as ‘active’).
User’s who ‘out of the box’ start using Metadata Utility and simply don’t follow the ‘initial Set-Up’ will first run into an issue, once an attempt to either Generate XML Files and/or Cache XML Files to their Local Profile. In that case, just follow the online documentation to update the Media Resource as needed.
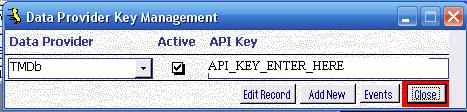
While ‘Metadata Utility – Data Provider API’ Key is opened you won’t be able to click on any other Windows that may be opened in the background. Close ‘Metadata Utility – Data Provider API’ Key to be able to go back to any other opened windows that may be opened in the background inside ‘Metadata Utility.
For additional Information on how to generate an API Key, see our Q&A Section: ‘The Movie Database’ (TMDb) API Key – Why is needed? (Inser_Link_Here).
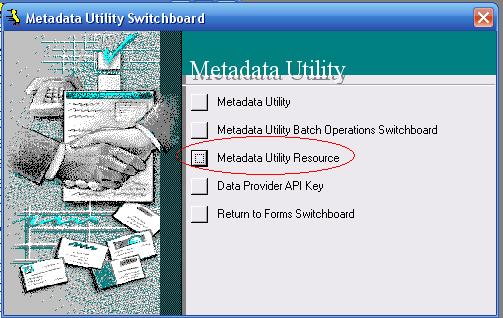
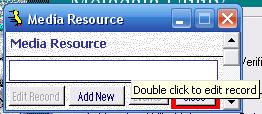
-Metadata Utility Resource
Enables Metadata Utility to check the Partition and/or /NAS Target location where the Movie Library is located and verify the (those) resource(s) is (are) Online before any process takes place.
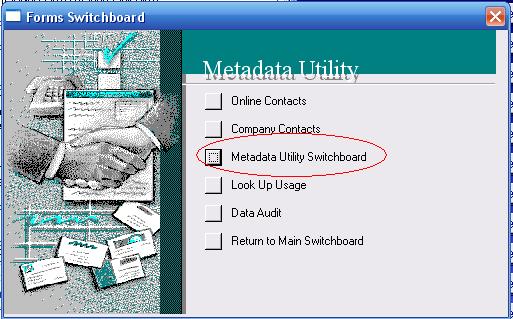
From Metadata Utility’s Main Switchboard,
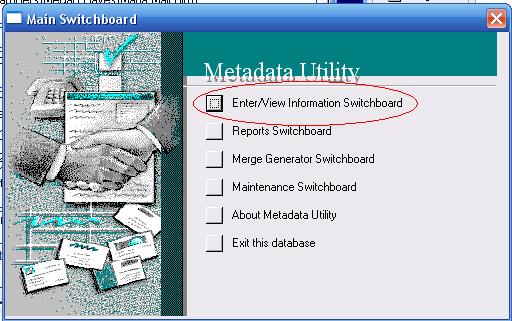
click on ‘Enter/View Information Switchboard
click on ‘Metadata Utility Switchboard’
click on ‘Metadata Utility Resource’
Note: if you need to add more than one Resource, then use the scroll bar to scroll to the next field underneath, or click on the ‘Tab’ Key on your Keyboard to navigate to the following record.
Always remember, if a field has a white background, then the field is locked. In such case, double clicking on the field, will unlock it (or alternative, you can also click on the ‘Edit Record’ Button –remember on first time opening, that the button may not be enabled. This is not an error, is part of the design in Metadata Utility for safety).
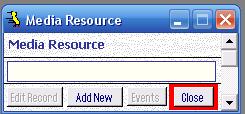
To verify the resources you entered have been saved, you can close and re-open ‘Metadata Utility Resource’.
While ‘Metadata Utility Resource’ is opened you won’t be able to click on any other Windows that may be opened in the background. Close ‘Metadata Utility Resource’ to be able to go back to any other opened windows that may be opened in the background inside ‘Metadata Utility.
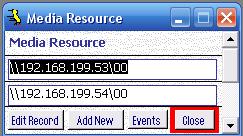
On a brand new installation, the “Metadata Utility Resource” will come with a sample “Metadata Utility Resource” List. For older ‘Legacy’ installations, that list may be empty (as seen in the picture to the right).

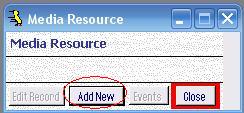

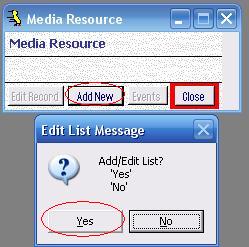
-click on ‘Add New’ and/or ‘Edit’ List.
-double click on the ‘Media Resource’ Field (white area).
-once in Yellow, then you can enter the Resource Information

Note: Do NOT include a Backslash at the end of Path of ‘Media Resource’.
-Metadata Utility – Data Provider API Key
If a Data Provider has not been registered, then enter ‘The Movie Database’ API Key – Make sure that you select only one single entry as ‘Active’ (in case you had multiple API Keys, even from the same Provider, then select only one API Key active. You can enter as many keys as you want, just make sure all other ones are NOT selected as ‘active’).
Note: Due to many requests from our Users, on the latest Builds of Metadata Utility, we have been including a Pre-Populated Media Resource as seen in the picture immediately above. This is to further assist our new users as to what it is needed in Metadata Utility for proper operation.
User’s who ‘out of the box’ start using Metadata Utility and simply don’t follow the ‘initial Set-Up’ will first run into an issue, once an attempt to either Generate XML Files and/or Cache XML Files to their Local Profile. In that case, just follow the online documentation to update the Media Resource as needed.
For additional Information, see our Q&A Section: ‘The Movie Database’ (TMDb) API Key – Why is needed?
While ‘Metadata Utility – Data Provider API’ Key is opened you won’t be able to click on any other Windows that may be opened in the background. Close ‘Metadata Utility – Data Provider API’ Key to be able to go back to any other opened windows that may be opened in the background inside ‘Metadata Utility.
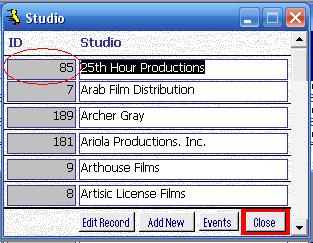
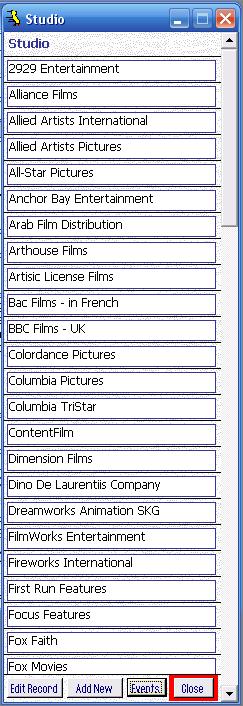
-Studio
Metadata Utility comes with a Pre-Build List of approximately 200+ of the most commonly known Studios.
If you have a movie in which the Studio is not in the list, you can always Double Click on the Studio Field to Open the Studio List and Edit, Add, Studios as needed.
Note: If you overwrite, rename or delete a Studio Name, then keep in mind that any existing record in Metadata Utility that had that Studio linked, than those movies will automatically be updated with the change (and/or deletion) of the Studio that you just made (Remember Metadata utility is an RDBMS. Since all Data is linked, if you change one record, you can potentially affect many other records).
We recommended, that you don’t Delete Studios, but better Add more, if needed.
‘Out of the box’ Metadata Utility comes with approximately 5399 pre-allocated of Records, out of which, in the case of the ‘Studio’ List only 200+ are in use, thus leaving plenty records available for further use before Metadata Utility will require additional action to increase the number of possible Studios available : ).
While the ‘Studio’ List is opened you won’t be able to click on any other Windows that may be opened in the background. Close ‘Studio’ List to be able to go back to any other opened windows that may be opened in the background inside ‘Metadata Utility.
Note: Use extreme caution before deleting ANY existing Studios from the list as a deletion of a Studio will also delete that Studio Information from ALL Records that were linked to that Studio. This also applies to renaming an existing Studio. If you rename an existing Studio in the list, then all records linked to that Studio will automatically also be updated.
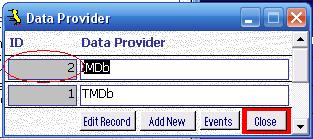
-Data Provider
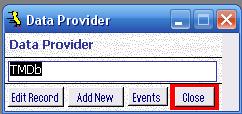
Metadata Utility comes with a Pre-Build List of 2 of Data Providers: The Movie Database (TMDb) and IMDB.
Metadata Utility’s Movie Online Search Tool enables you to automatically add most of your movies. The Movie Database (TMDb) is the main provider that Metadata Utility’s Movie Online Search Tool uses to search the Movie Metadata Information.
If you want to add more Data Providers, then you can always Double Click on the Data Provider Field to Open the Data Provider List and Edit, Add/Edit, as needed.
Note: If you overwrite, rename or delete a Data Provider, then keep in mind that Data Provider, if it has already been linked to any of your movies, then that Data Provider will be also lost (or edited) for all movies linked to it (Remember Metadata utility is an RDBMS. Since all Data is linked, if you change one record, you can potentially affect many other records).
We recommend, that you don’t Delete a Data Provider, but better Add more, if needed.
You can add up to 5399 Data Providers before Metadata Utility will require additional action : ).
While ‘Data Provider’ Key is opened you won’t be able to click on any other Windows that may be opened in the background. Close ‘Data Provider’ Key to be able to go back to any other opened windows that may be opened in the background inside ‘Metadata Utility.
Note: Use extreme caution before deleting ANY Data Provider from the list as a deletion of a Data Provider will also delete that Data Provider Information from ALL Records that were linked to that Data Provider. This also applies to renaming an existing Data Provider . If you rename an existing Data Provider in the list, then all records linked to that Data Provider will automatically also be updated.
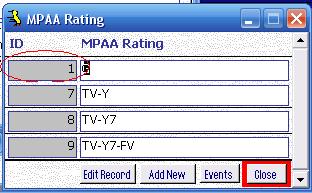
-MPAA Rating
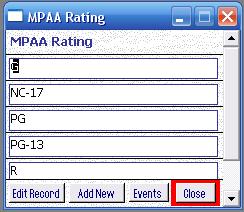
Metadata Utility comes with a Pre-Build List of the MPAA (Motion Picture Association of America).
If you want to add/Edit the MPAA Rating List (either add your own Rating System an/or add the particular Rating system in the country you live), then you can always Double Click on the MPAA Rating Field to Open the MPAA Rating List and Edit, Add, Studios as needed.
Note: If you overwrite, rename or delete a MPAA Rating, then keep in mind that MPAA Rating, if it has already been linked to any of your movies, then that Data Provider will be also lost (or edited) for all movies linked to it (Remember Metadata utility is an RDBMS. Since all Data is linked, if you change one record, you can potentially affect many other records).
We recommend, that you don’t Delete a Data Provider, but better Add more, if needed.
You can add up to 5399 MPAA Rating before Metadata Utility will require additional action : ).
While ‘MPAA Rating’ Key is opened you won’t be able to click on any other Windows that may be opened in the background. Close ‘MPAA Rating’ Key to be able to go back to any other opened windows that may be opened in the background inside ‘Metadata Utility.
Note: Use extreme caution before deleting ANY MPAA Rating from the list as a deletion of a MPAA Rating will also delete that MPAA Rating Information from ALL Records that were linked to that MPAA Rating. This also applies to renaming an existing MPAA Rating. If you rename an existing MPAA Rating in the list, then all records linked to that MPAA Rating will automatically also be updated.
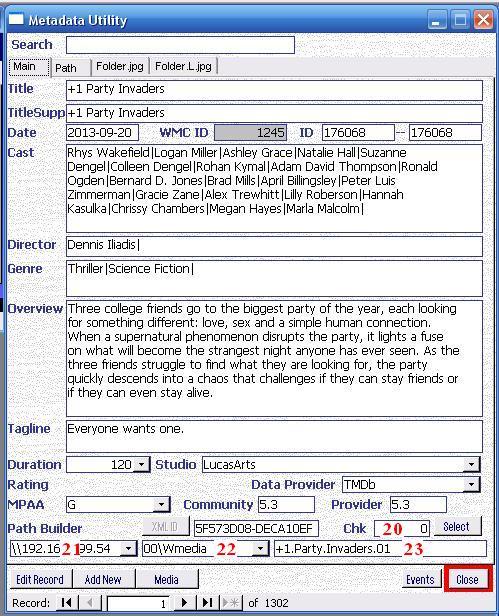
-Path Builder
Metadata Utility uses 3 Main Fields to Build the Path for any Movie. Out of the box Metadata Utility comes with a Pre-Built List for ‘Path Builder 01’ and ‘Path Builder 02’.

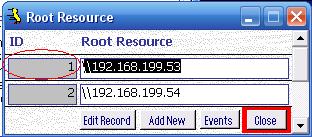
Path Builder 01
Should be the NAS Name (UNC Path) or IP (UNC Path) – see examples immediately to the right.
In order to create/add a list, just, as with any of the drop downs, double click on the field to open the list and edit as needed.
For Example:
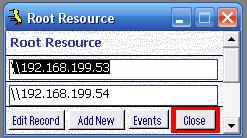
If you have all your movies in within to NAS Storages, then you would create a record for each NAS:
\\192.168.199.53
\\192.168.199.54
(Notice is JUST the IP in UNC Format and at the end of the NAS IP and/or NAS Name there is NO Backslash at the end of the NAS Name or IP Address – Metadata Utility will add a backlash after the NAS and/or IP automatically).
If you want to enter the NAS by Name, then:
\\NAS01
\\NAS02
Notice, there is NO Backslash after the NAS IP (or NAS Name).
Do NOT include a Backslash after the NAS IP (or NAS Name) as Metadata Utility will do that automatically (see in Section ‘Path’ as described before).
While ‘Path Builder 01’ Key is opened you won’t be able to click on any other Windows that may be opened in the background. Close ‘Path Builder 01’ Key to be able to go back to any other opened windows that may be opened in the background inside ‘Metadata Utility.
Note: Use extreme caution before deleting ANY Path Builder 01 from the list as a deletion of a Path Builder 01 will also delete that Path Builder 01 Information from ALL Records that were linked to that Path Builder 01. This also applies to renaming an existing Path Builder 01. If you rename an existing Path Builder 01 in the list, then all records linked to that Path Builder 01 will automatically also be updated.
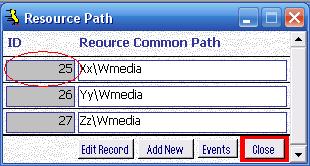
Path Builder 02
In order to create/add a list, just, as with any of the drop downs, double click on the field to open the list and edit as needed.
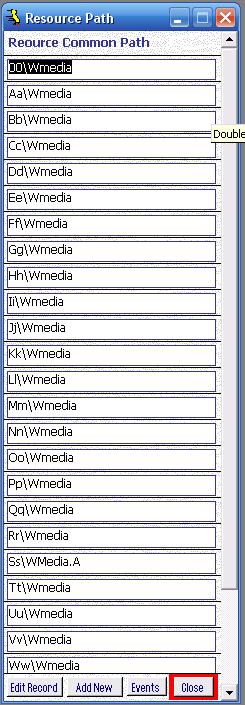
In this particular example, we have a list of the possible Shares that could be found on each NAS that is used by Windows Media Center:
Path02
00\Wmedia
Aa\Wmedia
Bb\Wmedia
Cc\Wmedia
Dd\Wmedia
Ee\Wmedia
Ff\Wmedia
Gg\Wmedia
Hh\Wmedia
Ii\Wmedia
Jj\Wmedia
Kk\Wmedia
Ll\Wmedia
Mm\Wmedia
Nn\Wmedia
Oo\Wmedia
Pp\Wmedia
Qq\Wmedia
Rr\Wmedia
Ss\WMedia.A
Tt\Wmedia
Uu\Wmedia
Vv\Wmedia
Ww\Wmedia
Xx\Wmedia
Yy\Wmedia
Zz\Wmedia
Notice, that on the Share ‘Ss’ the Directory where the Movies are located is called ‘WMedia.A’ where all others are called ‘Wmedia’ –that could have been deliberate, or error, but either way, Metadata Utility is extremely flexible to accommodate your naming conventions.
For the ongoing example of a 2 NAS Setup with 27 Shares on each NAS (an in within these 27 different Shares are all the movies stored), then you basically have a good idea how flexible Metadata Utility can be.
Do NOT include a Backslash at the end of Path Builder 02 as Metadata Utility will do that automatically (see in Section ‘Path’ as described before).
While ‘Path Builder 02’ Key is opened you won’t be able to click on any other Windows that may be opened in the background. Close ‘Path Builder 02’ Key to be able to go back to any other opened windows that may be opened in the background inside ‘Metadata Utility.
Note: Use extreme caution before deleting ANY Path Builder 02 from the list as a deletion of a Path Builder 02 will also delete that Path Builder 02 Information from ALL Records that were linked to that Path Builder 02. This also applies to renaming an existing Path Builder 02. If you rename an existing Path Builder 02 in the list, then all records linked to that Path Builder 02 will automatically also be updated.
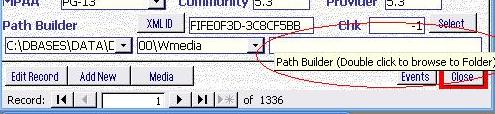
Path Builder 03
Is NOT a drop down list, but an actual Field will you will enter the exact Name of the Directory (Folder) that contains your movie.
For example
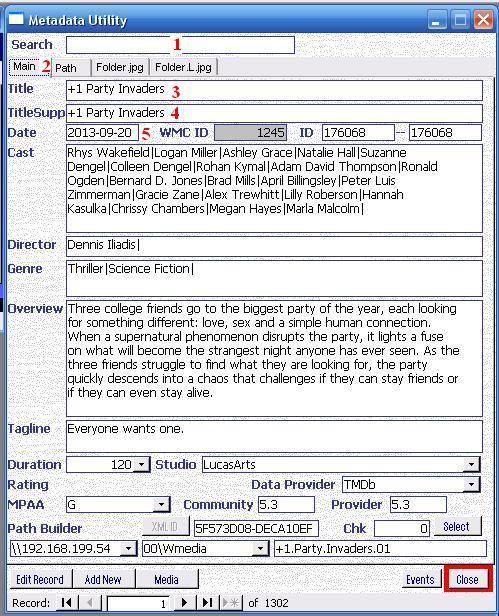
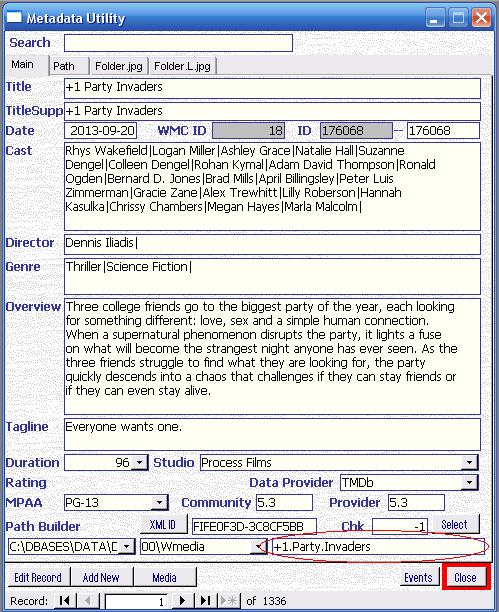
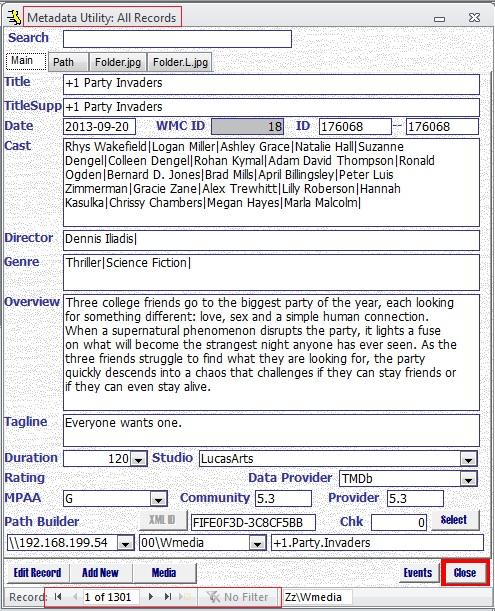
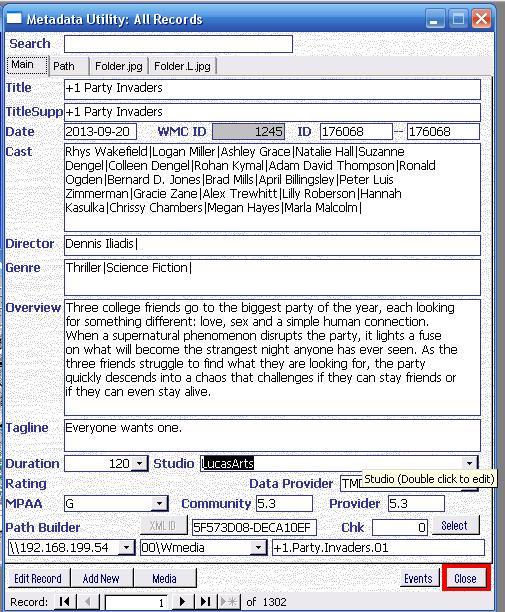
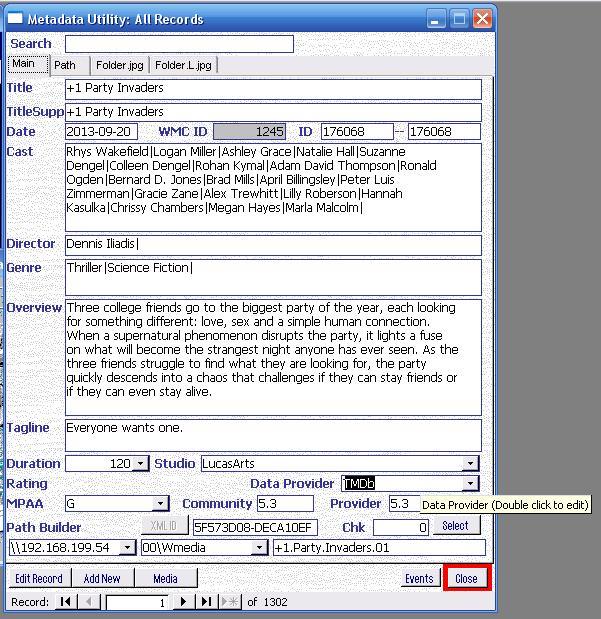
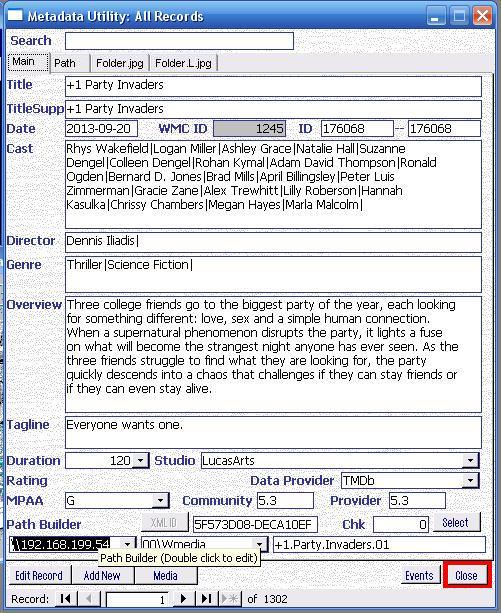
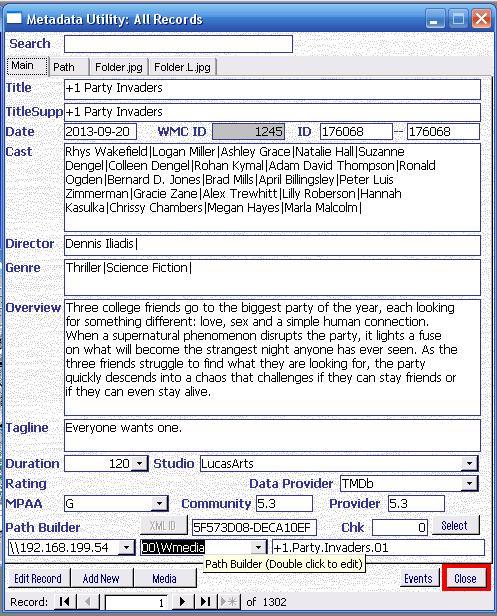
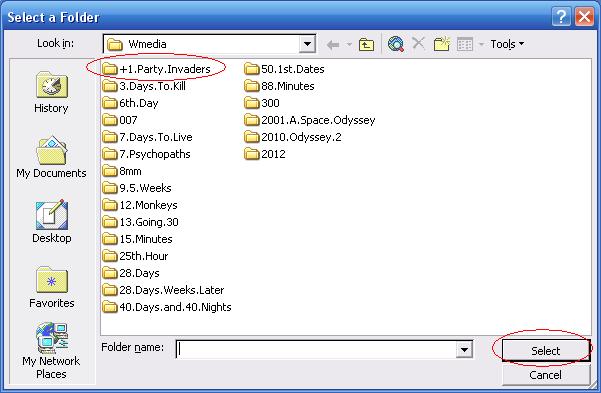
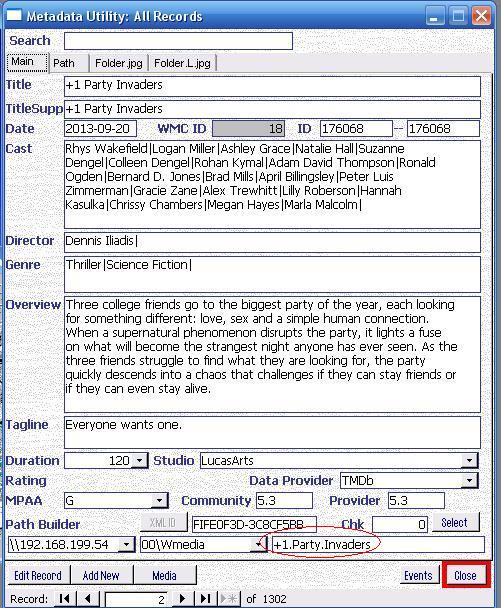
On the movie: +1 Party Invaders
Path Builder 01: \\192.168.199.54
Path Builder 02: 00\Wmedia
Path Builder 03: +1.Party.Invaders
Once clicked on the ‘Path’ Section, you will see what the complete Path will look like:
This means that the movie ‘+1 Party Invaders’ should be located in the following path:
\\192.168.199.54\00\Wmedia+1.Party.Invaders
Note: Do NOT include a Backslash at the end of Path Builder 03.
Example:
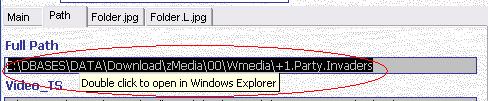
Metadata Utility: Path
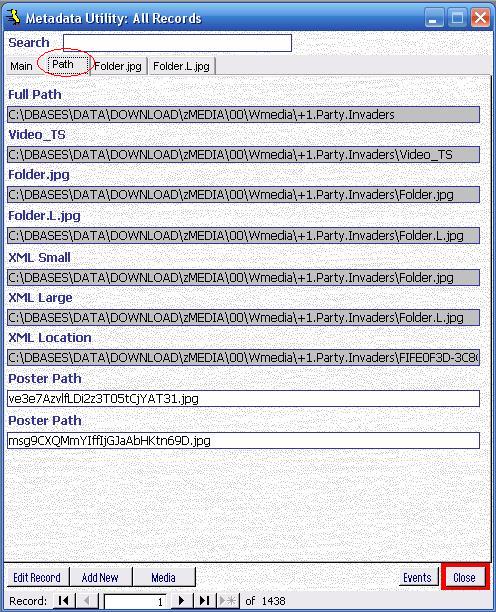
Full Path:
Shows you the Movie Path that built using Path Builder 01 + Path Builder 02 + Path Builder 03. Use this section to: double check that the Patch you built is accurate, that no double backslashes are found in within (middle) your built path –if there are, is because you added a backslash in either Path Builder 01 and/or Path Builder 02 and in such case, you need to go back, edit your entry and remove that backslash you entered– as well as checking that you did NOT entered a backslash at the end on Path Builder 03.
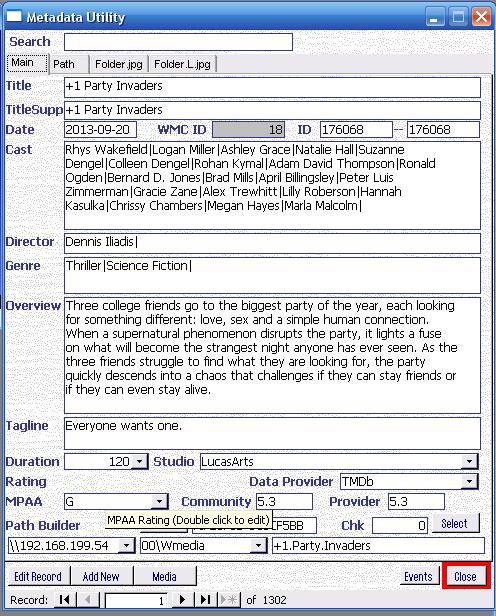
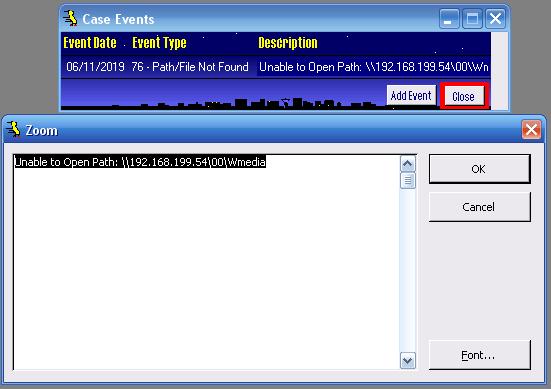
A good way to check if the path you are seeing is correct, is to open the path by double clicking on the ‘Full Path’ field and let Metadata Utility open the path:
If Metadata Utility is unable to open that path, then an Automatic Event will be generated indicating that the path you created is wrong and needs to be double checked and be corrected (as seen in the picture to the right showing the Automatic Case Event generated indicating the Path to the Movie could not be found –for example a cause could be that if the NAS/Partition where you have your movies is offline, then you will get that message. If you also have an error in your Path you build using Path builder, then you will see that error as your path will be wrong. In that case, then make the corrections as necessary and try again–).
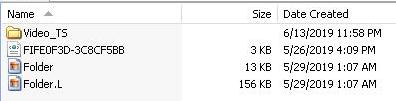
Video_TS:
Location where the Movie Data Files are normally stored. This section is specially useful for advanced users and advanced troubleshooting.
Folder.jpg
Shows the path where the Thumb-nail-size Cover-Art File must be located and named.
Note: File Name must be: Folder.jpg
For additional details about this section, refer to: ‘Metadata Utility: Path’
FolderL.jpg
Shows the path where the Poster-size Cover-Art File must be located and named.
Note: File Name must be: Folder.L.jpg
For additional details about this section, refer to: ‘Metadata Utility: Path’
Note: Film Duration – Metadata Utility has an already built in list from 1 to 5399 Minutes (we think that is enough as we have yet to find a Movie with 89+ Hours of length : ) ).
XMLSmall
Shows the path Metadata Utility will be using to generate the necessary XML File with a link the Artwork (small picture or Thumbnail size picture).
XMLLarge
Shows the path Metadata Utility will be using to generate the necessary XML File with a link the Artwork (large picture or Poster size picture).
XMLLocation
Shows the path Metadata Utility will be using to generate the necessary XML File.
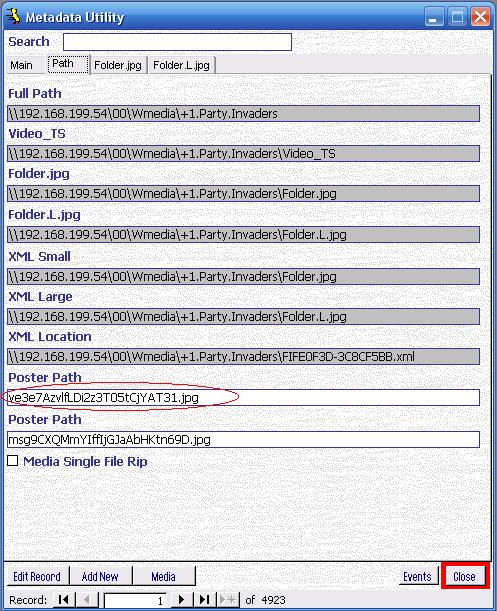
Poster Path
Poster Path: File Name (in jpg format needed) used for Coverart download.
Verify that the Path of the Movie + Path for the CoverArt Files is correct.
Verify that the NAS (or Partition) where the Movies are located is Online.
For additional Information please look at section: ‘Metadata Utility: Path’.