Upon installation, there are a few Settings to SetUp:
Metadata Utility
-License Management
Metadata Utility
Allows you to Register the License(s) of the purchased Feature(s), ie. ‘Windows Media Center’ Metadata ‘XML’ Management, etc

Metadata Utility
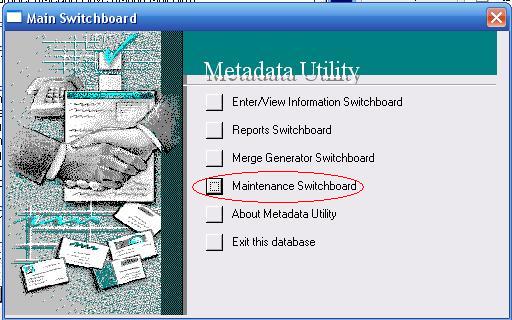
To access ‘License Management” follow these steps:
From the Main Switchboard, click on ‘Maintenance Switchboard’
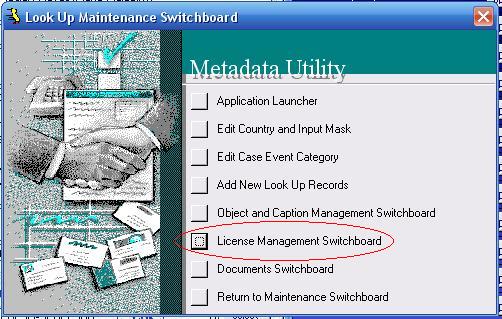
click on ‘Look Up Maintenance Switchboard’

click on ‘License Management Switchboard’
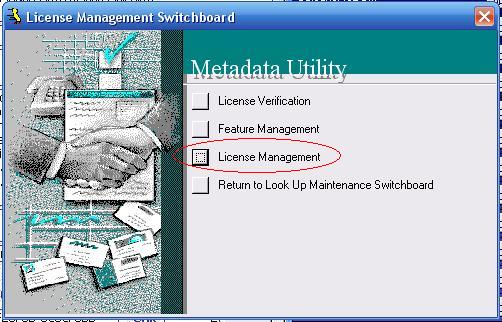
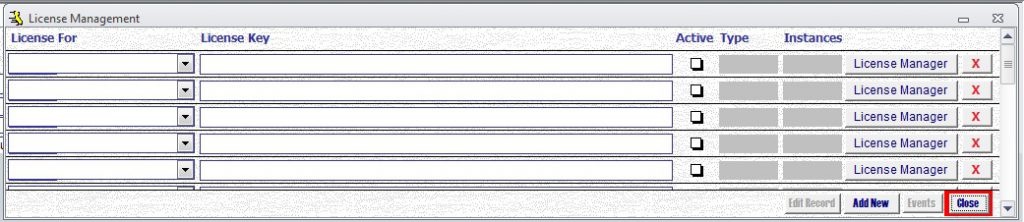
click on ‘License Management’
-Register New License
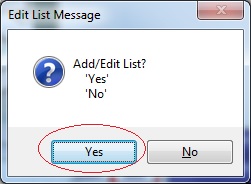
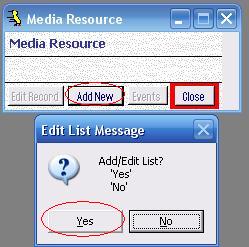
click on ‘Add New’
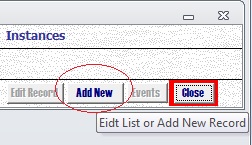
click ‘Yes’ to continue or ‘No’ to cancel
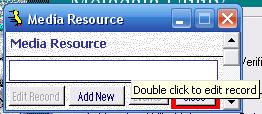
double click to edit record

Select the Stage to register

click on ‘License Manager’

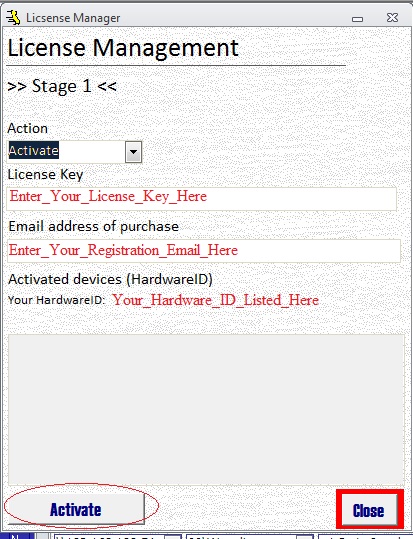
-Select ‘Activate’
-Enter the License Key
-Enter the registered Email Address
-click ‘Activate’
Confirmation upon successful registration
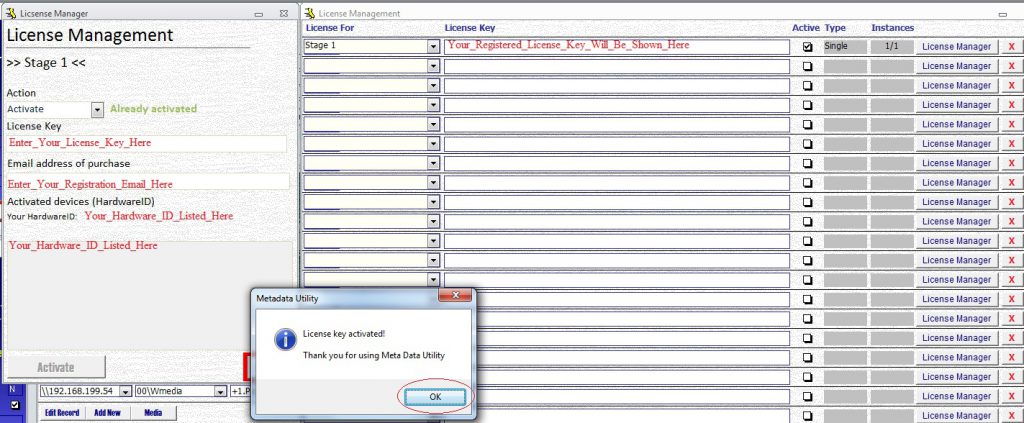
-Click ‘ok’ on the confirmation Message
-click ‘Close’ to close ‘License Manager’
-click ‘Close’ to close ‘License Management’ or, continue to register other Stage Licenses (ie. Stage 2, Stage 3, etc)
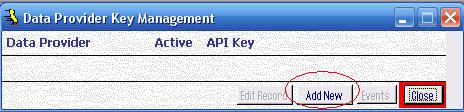
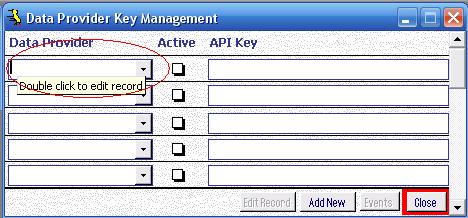
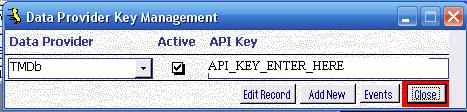
-Data Provider API Key Management
In order to use ‘Metadata Utility Online Search Tool’, ie. to search online and download movie(s) information, you will need to register a Search Provider. Metadata Utility uses ‘The Movie Database’ as the main search provider for movie information.
Click ‘Add New’
Click ‘Yes’ to Edit List
Double Click to Edit
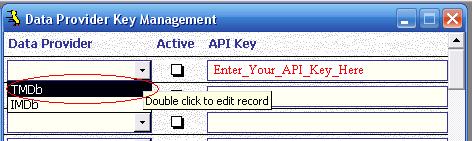
Select ‘TmDb’ + Enter Your Data Provider API Key
Click on ‘Active’ to activate your API Key
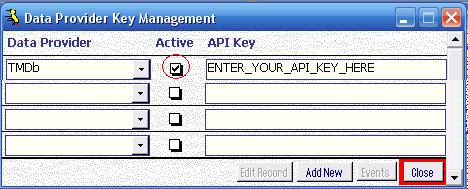
Click ‘Close’
Note: Enter ‘The Movie Database’ API Key – Make sure that you select only one single entry as ‘Active’ (in case you had multiple API Keys, even from the same Provider, then select only one API Key active. You can enter as many keys as you want, just make sure all other ones are NOT selected as ‘active’).
User’s who ‘out of the box’ start using Metadata Utility and simply don’t follow the ‘initial Set-Up’ will first run into an issue, once an attempt to either Generate XML Files and/or Cache XML Files to their Local Profile. In that case, just follow the online documentation to update the Media Resource as needed.
While ‘Metadata Utility – Data Provider API’ Key is opened you won’t be able to click on any other Windows that may be opened in the background. Close ‘Metadata Utility – Data Provider API’ Key to be able to go back to any other opened windows that may be opened in the background inside ‘Metadata Utility.
For additional Information on how to generate an API Key, see our Q&A Section: ‘The Movie Database’ (TMDb) API Key – Why is needed? (Inser_Link_Here).
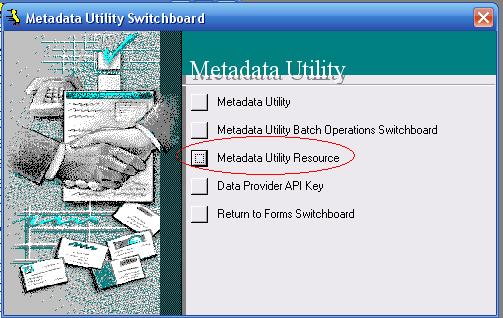
-Metadata Utility Resource
Enables Metadata Utility to check the Partition and/or /NAS Target location where the Movie Library is located and verify the (those) resource(s) is (are) Online before any process takes place.
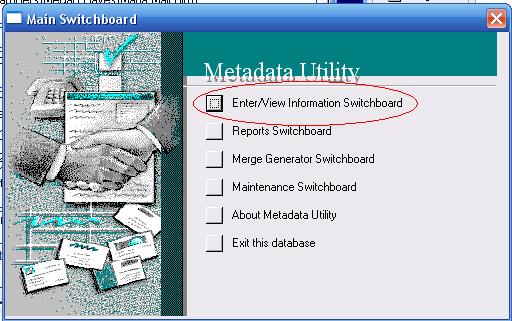
From Metadata Utility’s Main Switchboard,
click on ‘Enter/View Information Switchboard
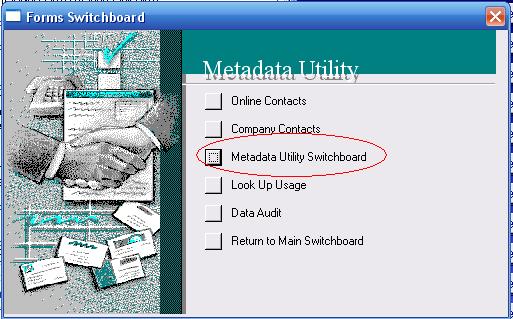
click on ‘Metadata Utility Switchboard’
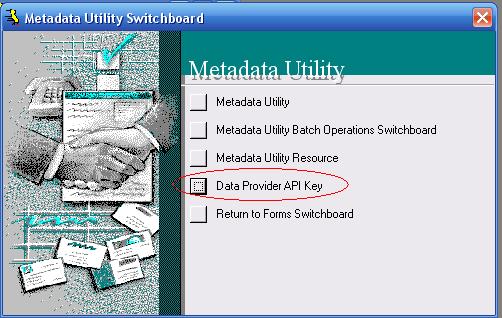
click on ‘Metadata Utility Resource’
Note: if you need to add more than one Resource, then use the scroll bar to scroll to the next field underneath, or click on the ‘Tab’ Key on your Keyboard to navigate to the following record.
Always remember, if a field has a white background, then the field is locked. In such case, double clicking on the field, will unlock it (or alternative, you can also click on the ‘Edit Record’ Button –remember on first time opening, that the button may not be enabled. This is not an error, is part of the design in Metadata Utility for safety).
To verify the resources you entered have been saved, you can close and re-open ‘Metadata Utility Resource’.
While ‘Metadata Utility Resource’ is opened you won’t be able to click on any other Windows that may be opened in the background. Close ‘Metadata Utility Resource’ to be able to go back to any other opened windows that may be opened in the background inside ‘Metadata Utility.
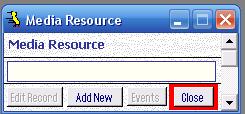
On a brand new installation, the “Metadata Utility Resource” will come with a sample “Metadata Utility Resource” List. For older ‘Legacy’ installations, that list may be empty (as seen in the picture to the right).

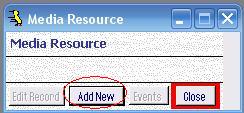

-click on ‘Add New’ and/or ‘Edit’ List.
-double click on the ‘Media Resource’ Field (white area).
-once in Yellow, then you can enter the Resource Information

Note: Do NOT include a Backslash at the end of Path of ‘Media Resource’.
-Metadata Utility – Data Provider API Key
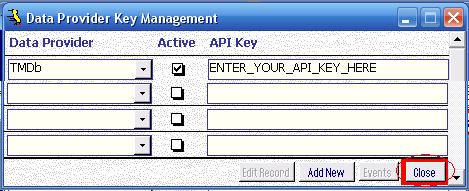
If a Data Provider has not been registered, then enter ‘The Movie Database’ API Key – Make sure that you select only one single entry as ‘Active’ (in case you had multiple API Keys, even from the same Provider, then select only one API Key active. You can enter as many keys as you want, just make sure all other ones are NOT selected as ‘active’).
Note: Due to many requests from our Users, on the latest Builds of Metadata Utility, we have been including a Pre-Populated Media Resource as seen in the picture immediately above. This is to further assist our new users as to what it is needed in Metadata Utility for proper operation.
User’s who ‘out of the box’ start using Metadata Utility and simply don’t follow the ‘initial Set-Up’ will first run into an issue, once an attempt to either Generate XML Files and/or Cache XML Files to their Local Profile. In that case, just follow the online documentation to update the Media Resource as needed.
For additional Information, see our Q&A Section: ‘The Movie Database’ (TMDb) API Key – Why is needed?
While ‘Metadata Utility – Data Provider API’ Key is opened you won’t be able to click on any other Windows that may be opened in the background. Close ‘Metadata Utility – Data Provider API’ Key to be able to go back to any other opened windows that may be opened in the background inside ‘Metadata Utility.
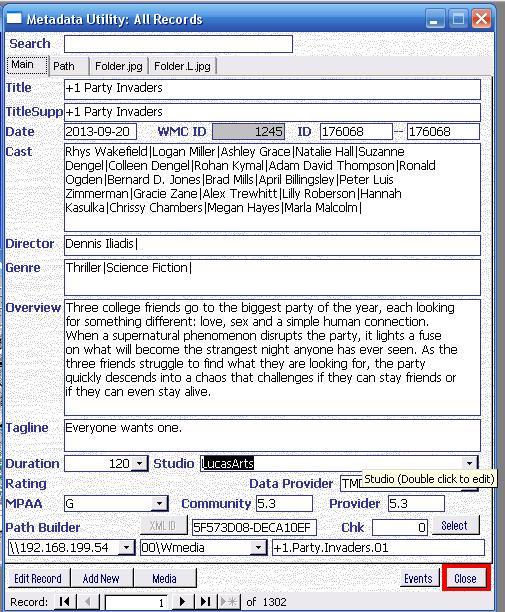
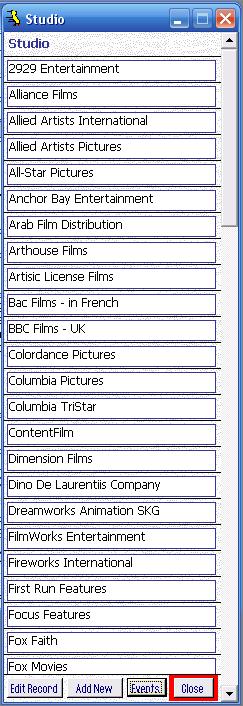
-Studio
Metadata Utility comes with a Pre-Build List of approximately 200+ of the most commonly known Studios.
If you have a movie in which the Studio is not in the list, you can always Double Click on the Studio Field to Open the Studio List and Edit, Add, Studios as needed.
Note: If you overwrite, rename or delete a Studio Name, then keep in mind that any existing record in Metadata Utility that had that Studio linked, than those movies will automatically be updated with the change (and/or deletion) of the Studio that you just made (Remember Metadata utility is an RDBMS. Since all Data is linked, if you change one record, you can potentially affect many other records).
We recommended, that you don’t Delete Studios, but better Add more, if needed.
‘Out of the box’ Metadata Utility comes with approximately 5399 pre-allocated of Records, out of which, in the case of the ‘Studio’ List only 200+ are in use, thus leaving plenty records available for further use before Metadata Utility will require additional action to increase the number of possible Studios available : ).
While the ‘Studio’ List is opened you won’t be able to click on any other Windows that may be opened in the background. Close ‘Studio’ List to be able to go back to any other opened windows that may be opened in the background inside ‘Metadata Utility.
Note: Use extreme caution before deleting ANY existing Studios from the list as a deletion of a Studio will also delete that Studio Information from ALL Records that were linked to that Studio. This also applies to renaming an existing Studio. If you rename an existing Studio in the list, then all records linked to that Studio will automatically also be updated.
-Data Provider
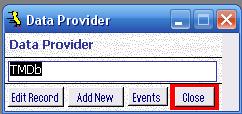
Metadata Utility comes with a Pre-Build List of 2 of Data Providers: The Movie Database (TMDb) and IMDB.
Metadata Utility’s Movie Online Search Tool enables you to automatically add most of your movies. The Movie Database (TMDb) is the main provider that Metadata Utility’s Movie Online Search Tool uses to search the Movie Metadata Information.
If you want to add more Data Providers, then you can always Double Click on the Data Provider Field to Open the Data Provider List and Edit, Add/Edit, as needed.
Note: If you overwrite, rename or delete a Data Provider, then keep in mind that Data Provider, if it has already been linked to any of your movies, then that Data Provider will be also lost (or edited) for all movies linked to it (Remember Metadata utility is an RDBMS. Since all Data is linked, if you change one record, you can potentially affect many other records).
We recommend, that you don’t Delete a Data Provider, but better Add more, if needed.
You can add up to 5399 Data Providers before Metadata Utility will require additional action : ).
While ‘Data Provider’ Key is opened you won’t be able to click on any other Windows that may be opened in the background. Close ‘Data Provider’ Key to be able to go back to any other opened windows that may be opened in the background inside ‘Metadata Utility.
Note: Use extreme caution before deleting ANY Data Provider from the list as a deletion of a Data Provider will also delete that Data Provider Information from ALL Records that were linked to that Data Provider. This also applies to renaming an existing Data Provider . If you rename an existing Data Provider in the list, then all records linked to that Data Provider will automatically also be updated.
-MPAA Rating
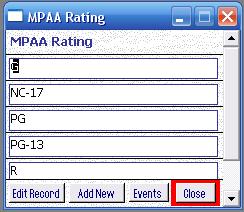
Metadata Utility comes with a Pre-Build List of the MPAA (Motion Picture Association of America).
If you want to add/Edit the MPAA Rating List (either add your own Rating System an/or add the particular Rating system in the country you live), then you can always Double Click on the MPAA Rating Field to Open the MPAA Rating List and Edit, Add, Studios as needed.
Note: If you overwrite, rename or delete a MPAA Rating, then keep in mind that MPAA Rating, if it has already been linked to any of your movies, then that Data Provider will be also lost (or edited) for all movies linked to it (Remember Metadata utility is an RDBMS. Since all Data is linked, if you change one record, you can potentially affect many other records).
We recommend, that you don’t Delete a Data Provider, but better Add more, if needed.
You can add up to 5399 MPAA Rating before Metadata Utility will require additional action : ).
While ‘MPAA Rating’ Key is opened you won’t be able to click on any other Windows that may be opened in the background. Close ‘MPAA Rating’ Key to be able to go back to any other opened windows that may be opened in the background inside ‘Metadata Utility.
Note: Use extreme caution before deleting ANY MPAA Rating from the list as a deletion of a MPAA Rating will also delete that MPAA Rating Information from ALL Records that were linked to that MPAA Rating. This also applies to renaming an existing MPAA Rating. If you rename an existing MPAA Rating in the list, then all records linked to that MPAA Rating will automatically also be updated.
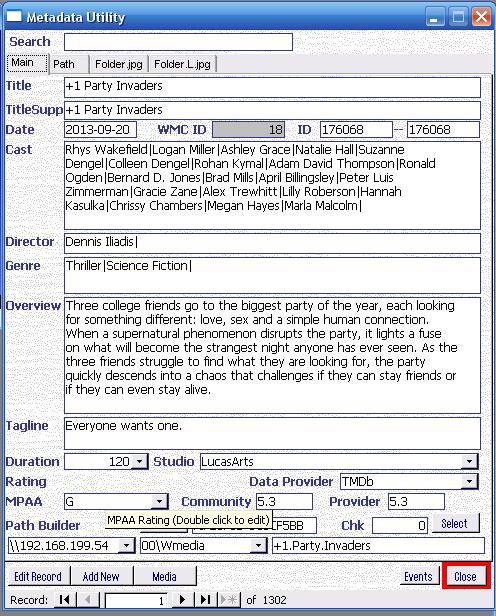
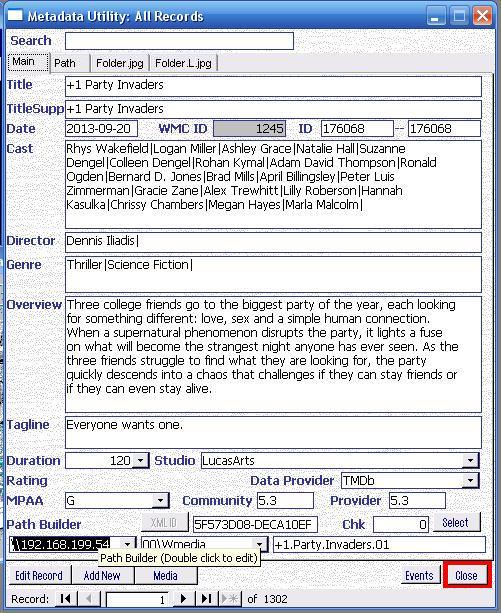
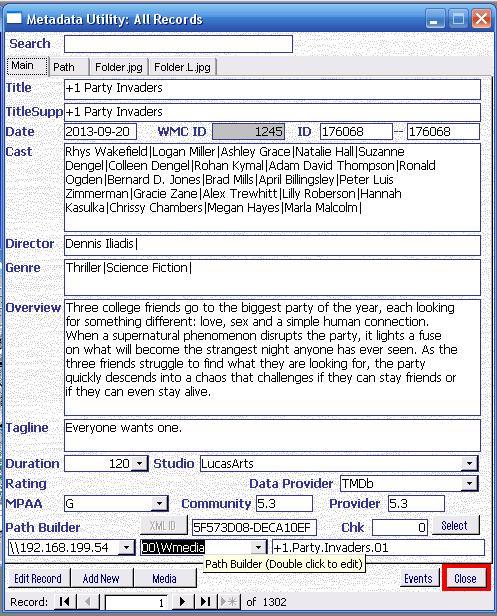
-Path Builder
Metadata Utility uses 3 Main Fields to Build the Path for any Movie. Out of the box Metadata Utility comes with a Pre-Built List for ‘Path Builder 01’ and ‘Path Builder 02’.

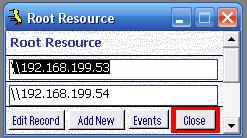
Path Builder 01
Should be the NAS Name (UNC Path) or IP (UNC Path) – see examples immediately to the right.
In order to create/add a list, just, as with any of the drop downs, double click on the field to open the list and edit as needed.
For Example:
If you have all your movies in within to NAS Storages, then you would create a record for each NAS:
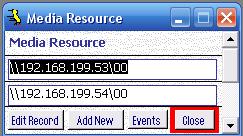
\\192.168.199.53
\\192.168.199.54
(Notice is JUST the IP in UNC Format and at the end of the NAS IP and/or NAS Name there is NO Backslash at the end of the NAS Name or IP Address – Metadata Utility will add a backlash after the NAS and/or IP automatically).
If you want to enter the NAS by Name, then:
\\NAS01
\\NAS02
Notice, there is NO Backslash after the NAS IP (or NAS Name).
Do NOT include a Backslash after the NAS IP (or NAS Name) as Metadata Utility will do that automatically (see in Section ‘Path’ as described before).

While ‘Path Builder 01’ Key is opened you won’t be able to click on any other Windows that may be opened in the background. Close ‘Path Builder 01’ Key to be able to go back to any other opened windows that may be opened in the background inside ‘Metadata Utility.
Note: Use extreme caution before deleting ANY Path Builder 01 from the list as a deletion of a Path Builder 01 will also delete that Path Builder 01 Information from ALL Records that were linked to that Path Builder 01. This also applies to renaming an existing Path Builder 01. If you rename an existing Path Builder 01 in the list, then all records linked to that Path Builder 01 will automatically also be updated.
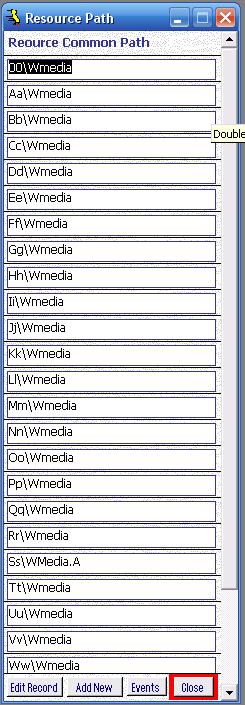
Path Builder 02
In order to create/add a list, just, as with any of the drop downs, double click on the field to open the list and edit as needed.
In this particular example, we have a list of the possible Shares that could be found on each NAS that is used by Windows Media Center:
Path02
00\Wmedia
Aa\Wmedia
Bb\Wmedia
Cc\Wmedia
Dd\Wmedia
Ee\Wmedia
Ff\Wmedia
Gg\Wmedia
Hh\Wmedia
Ii\Wmedia
Jj\Wmedia
Kk\Wmedia
Ll\Wmedia
Mm\Wmedia
Nn\Wmedia
Oo\Wmedia
Pp\Wmedia
Qq\Wmedia
Rr\Wmedia
Ss\WMedia.A
Tt\Wmedia
Uu\Wmedia
Vv\Wmedia
Ww\Wmedia
Xx\Wmedia
Yy\Wmedia
Zz\Wmedia
Notice, that on the Share ‘Ss’ the Directory where the Movies are located is called ‘WMedia.A’ where all others are called ‘Wmedia’ –that could have been deliberate, or error, but either way, Metadata Utility is extremely flexible to accommodate your naming conventions.
For the ongoing example of a 2 NAS Setup with 27 Shares on each NAS (an in within these 27 different Shares are all the movies stored), then you basically have a good idea how flexible Metadata Utility can be.
Do NOT include a Backslash at the end of Path Builder 02 as Metadata Utility will do that automatically (see in Section ‘Path’ as described before).
While ‘Path Builder 02’ Key is opened you won’t be able to click on any other Windows that may be opened in the background. Close ‘Path Builder 02’ Key to be able to go back to any other opened windows that may be opened in the background inside ‘Metadata Utility.
Note: Use extreme caution before deleting ANY Path Builder 02 from the list as a deletion of a Path Builder 02 will also delete that Path Builder 02 Information from ALL Records that were linked to that Path Builder 02. This also applies to renaming an existing Path Builder 02. If you rename an existing Path Builder 02 in the list, then all records linked to that Path Builder 02 will automatically also be updated.
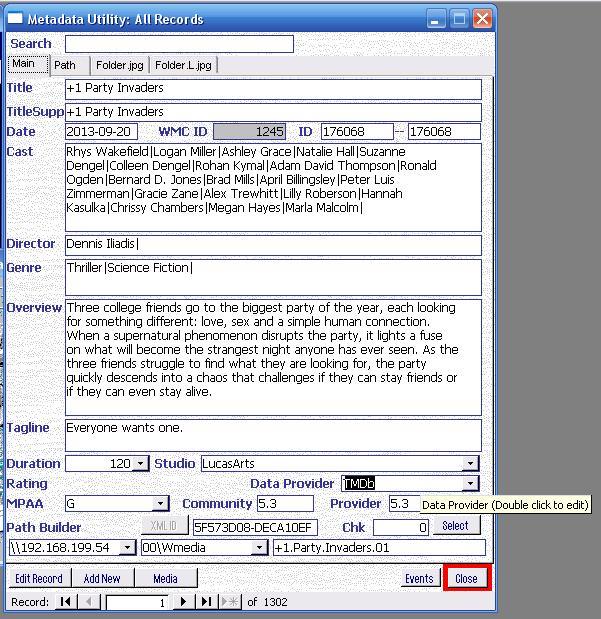
Path Builder 03
Is NOT a drop down list, but an actual Field will you will enter the exact Name of the Directory (Folder) that contains your movie.
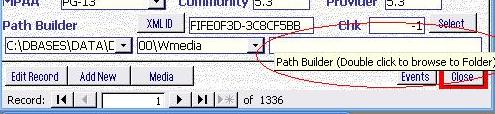
For example
On the movie: +1 Party Invaders
Path Builder 01: \\192.168.199.54
Path Builder 02: 00\Wmedia
Path Builder 03: +1.Party.Invaders
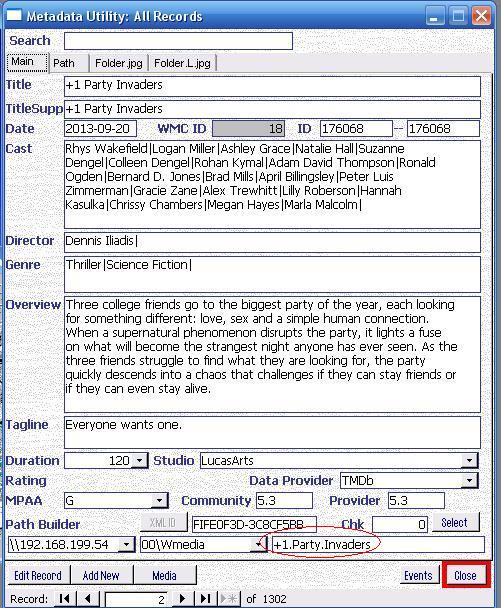
Once clicked on the ‘Path’ Section, you will see what the complete Path will look like:
This means that the movie ‘+1 Party Invaders’ should be located in the following path:
\\192.168.199.54\00\Wmedia+1.Party.Invaders
Note: Do NOT include a Backslash at the end of Path Builder 03.
Example:
Metadata Utility: Path
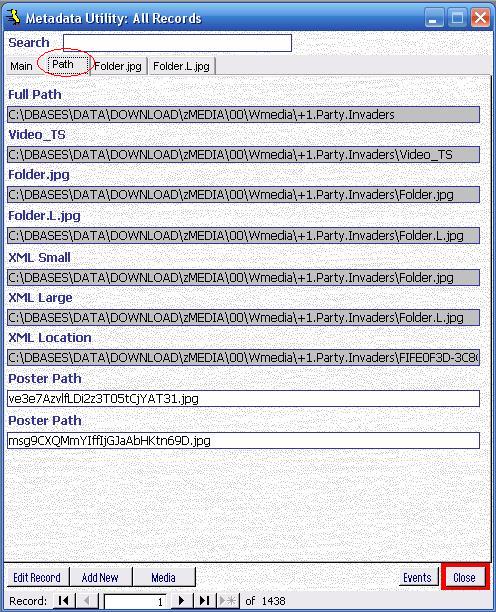
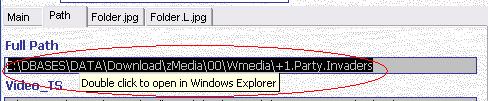
Full Path:
Shows you the Movie Path that built using Path Builder 01 + Path Builder 02 + Path Builder 03. Use this section to: double check that the Patch you built is accurate, that no double backslashes are found in within (middle) your built path –if there are, is because you added a backslash in either Path Builder 01 and/or Path Builder 02 and in such case, you need to go back, edit your entry and remove that backslash you entered– as well as checking that you did NOT entered a backslash at the end on Path Builder 03.
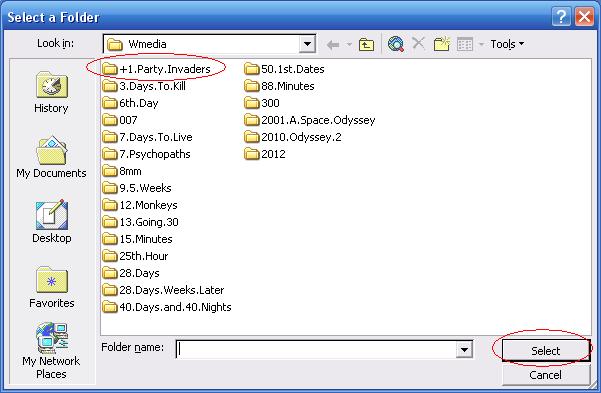
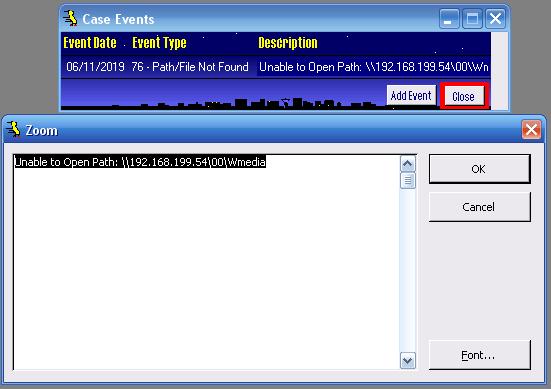
A good way to check if the path you are seeing is correct, is to open the path by double clicking on the ‘Full Path’ field and let Metadata Utility open the path:
If Metadata Utility is unable to open that path, then an Automatic Event will be generated indicating that the path you created is wrong and needs to be double checked and be corrected (as seen in the picture to the right showing the Automatic Case Event generated indicating the Path to the Movie could not be found –for example a cause could be that if the NAS/Partition where you have your movies is offline, then you will get that message. If you also have an error in your Path you build using Path builder, then you will see that error as your path will be wrong. In that case, then make the corrections as necessary and try again–).
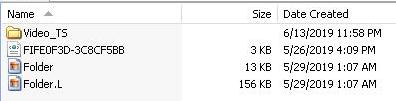
Video_TS:
Location where the Movie Data Files are normally stored. This section is specially useful for advanced users and advanced troubleshooting.
Folder.jpg
Shows the path where the Thumb-nail-size Cover-Art File must be located and named.
Note: File Name must be: Folder.jpg
For additional details about this section, refer to: ‘Metadata Utility: Path’
FolderL.jpg
Shows the path where the Poster-size Cover-Art File must be located and named.
Note: File Name must be: Folder.L.jpg
For additional details about this section, refer to: ‘Metadata Utility: Path’
Note: Film Duration – Metadata Utility has an already built in list from 1 to 5399 Minutes (we think that is enough as we have yet to find a Movie with 89+ Hours of length : ) ).
XMLSmall
Shows the path Metadata Utility will be using to generate the necessary XML File with a link the Artwork (small picture or Thumbnail size picture).
XMLLarge
Shows the path Metadata Utility will be using to generate the necessary XML File with a link the Artwork (large picture or Poster size picture).
XMLLocation
Shows the path Metadata Utility will be using to generate the necessary XML File.
Poster Path
Poster Path: File Name (in jpg format needed) used for Coverart download.