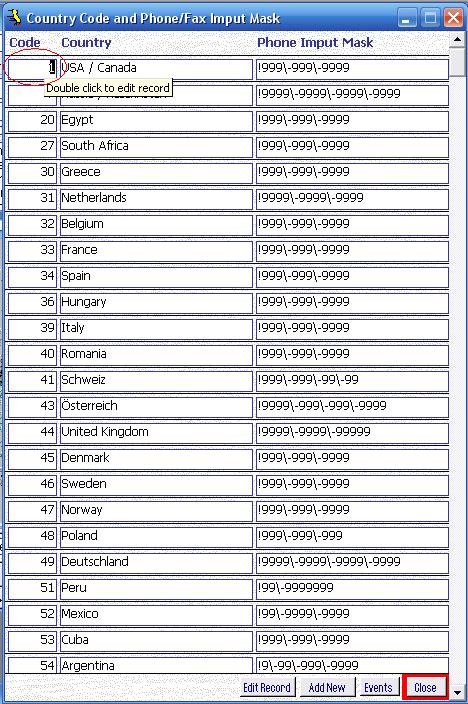
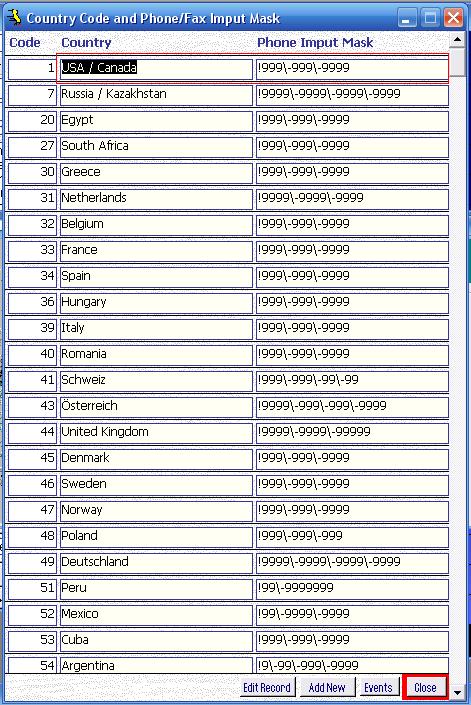
This section applies only to the following in within Metadata Utility:
-Telephone Number’s Input Mask
-Fax Number’s Input Mask
Each Country Code (and thus Country) is allows you to determine an InputMask for the mentioned above Fields in within Metadata Utility.
As described by Microsoft and in compliance with Metadata Utility’s Programming:
InputMask Property
You can use the InputMask property to make data entry easier and to control the values users can enter in a text box control. Read/write String.
Remarks
Input masks are helpful for data-entry operations such as an input mask for a Phone Number field that shows you exactly how to enter a new number: (___) ___-____.
The InputMask property can contain up to three sections separated by semicolons (;).
Section Description
First Specifies the input mask itself; for example, !(999) 999-9999. For a list of characters you can use to define the input mask, see the following table.
Second Specifies whether Microsoft Access stores the literal display characters in the table when you enter data. If you use 0 for this section, all literal display characters (for example, the parentheses in a phone number input mask) are stored with the value; if you enter 1 or leave this section blank, only characters typed into the control are stored.
Third Specifies the character that Microsoft Access displays for the space where you should type a character in the input mask. For this section, you can use any character; to display an empty string, use a space enclosed in quotation marks (” “).
You use a string expression to set this property. For example, the following specifies an input mask for a text box control used for entering a phone number:
You can define an input mask by using the following characters.
Character Description
0 Digit (0 to 9, entry required, plus [+] and minus [–] signs not allowed).
9 Digit or space (entry not required, plus and minus signs not allowed).
# Digit or space (entry not required; spaces are displayed as blanks while in Edit mode, but blanks are removed when data is saved; plus and minus signs allowed).
L Letter (A to Z, entry required).
? Letter (A to Z, entry optional).
A Letter or digit (entry required).
a Letter or digit (entry optional).
& Any character or a space (entry required).
C Any character or a space (entry optional).
. , : ; – / Decimal placeholder and thousand, date, and time separators. (The actual character used depends on the settings in the Regional Settings Properties dialog box in Windows Control Panel).
< Causes all characters to be converted to lowercase.
> Causes all characters to be converted to uppercase.
! Causes the input mask to display from right to left, rather than from left to right. Characters typed into the mask always fill it from left to right. You can include the exclamation point anywhere in the input mask.
\ Causes the character that follows to be displayed as the literal character (for example, \A is displayed as just A).